

The hero section is the first thing visitors see when they land on your website, making it one of the most important areas for capturing attention and creating a memorable first impression.
A static hero section can communicate your message, but an animated one can instantly make your website feel more modern, interactive, and engaging. The good news? You don’t need expensive tools or advanced coding skills to create stunning hero section animations.
In this step-by-step guide, you’ll learn how to create professional hero section animations for free and make your website stand out from the competition without writing a single line of code.
What Is a Hero Section?
A hero section is the large, prominent area displayed at the top of a website’s homepage or landing page. It is designed to immediately capture visitors’ attention and communicate the website’s primary message.
Typically, a hero section includes a compelling headline, a short description, a call-to-action (CTA) button, and supporting visuals such as images, videos, or illustrations.
A well-designed hero section can increase engagement, improve user experience, and encourage visitors to take action. When enhanced with subtle animations, it becomes even more effective at grabbing attention and guiding users toward your key content.
Types of Hero Section Animations
Hero section animations come in various styles, each serving a unique purpose. These are –
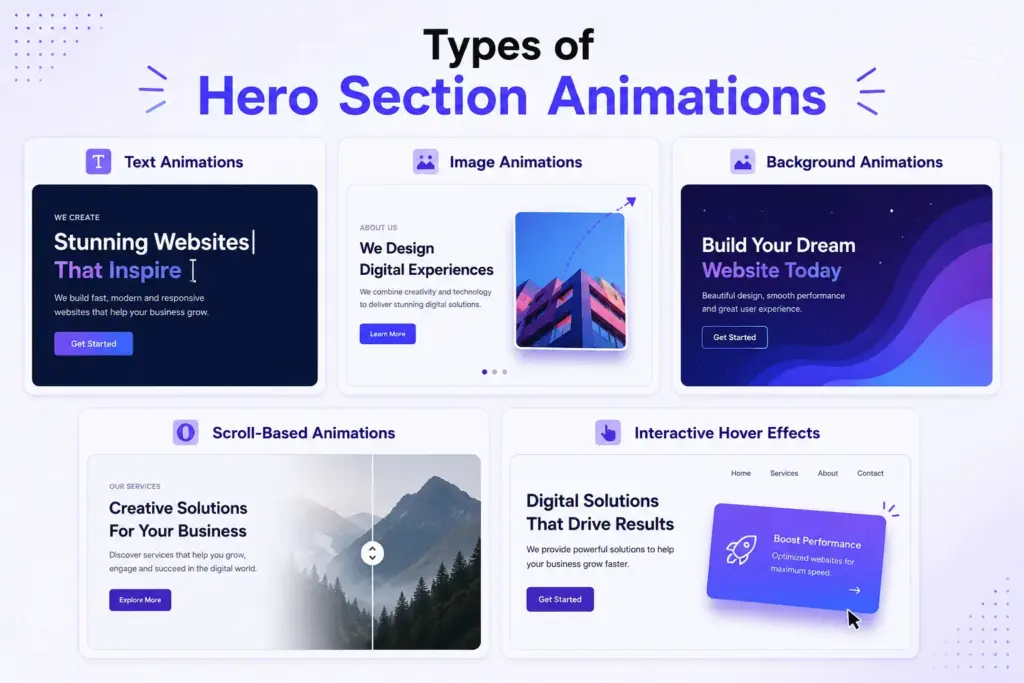
Text Animations
Text animations bring headlines and descriptions to life through effects such as fade-ins, slide-ins, typing effects, split-text reveals, and letter-by-letter transitions. These animations help emphasize key messages and encourage visitors to focus on important content as soon as they land on your page.
Image Animations
Image animations add movement to visuals within the hero section. Popular effects include zoom-in, floating elements, rotation, scaling, and reveal animations. These effects make static images more engaging and can effectively showcase products, services, or brand visuals.
Background Animations
Instead of keeping the background static, you can animate it using moving shapes, particles, gradients, waves, or video backgrounds. Background animations create depth and visual interest without distracting users from the main message.
Scroll-Based Animations
Scroll-triggered animations activate when visitors begin scrolling. Elements can fade, move, scale, or reveal themselves as users interact with the page. This creates a dynamic browsing experience and encourages users to explore further.
Interactive Hover Effects
Hover animations respond to user actions such as moving the mouse over buttons, images, or content blocks. Effects like color transitions, scaling, and subtle movements make the hero section feel more interactive and engaging while improving the overall user experience.
What You Need to Create Hero Section Animations for Free
With a few free tools, you can build professional-looking animations that enhance your website’s visual appeal and user experience.
WordPress Website
First, you’ll need a WordPress website where you can design and manage your pages. WordPress provides a flexible foundation and supports a wide range of page builders and animation plugins.
Elementor (Free Version)
The free version of Elementor is enough to create a custom hero section without coding. Its drag-and-drop interface makes it easy to add headings, images, buttons, and other elements that can later be animated.
Animation Addons (Free)
Animation Addons provides a collection of powerful animation effects designed specifically for Elementor users. With features like entrance animations, scroll effects, text animations, and interactive motion effects, you can create engaging hero sections without writing a single line of code.
Step-by-Step Guide: Create a Hero Section Animation for Free
In this tutorial, we’ll create an engaging hero section animation using the Starter Animation feature from Animation Addons. We’ll use the three types of animation effects to smoothly introduce the hero section content when visitors land on the page.
Step 1: Create Your Hero Section
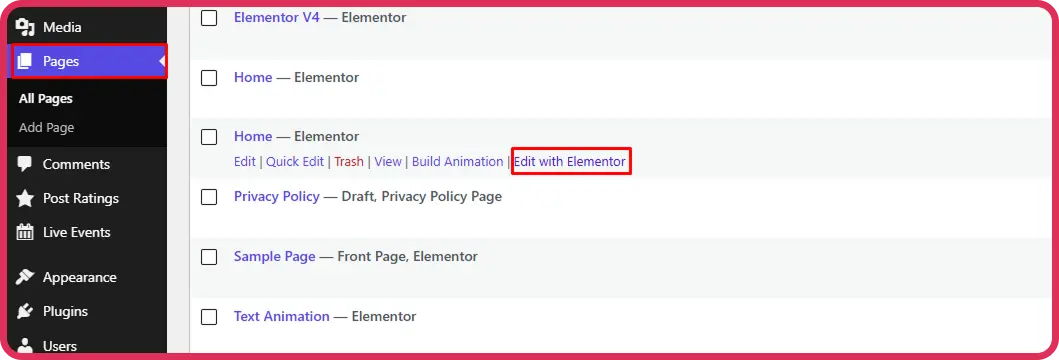
Open your page with Elementor and add a new section at the top of the page. This will serve as your hero section.
Add your desired background color, gradient, image, or video to create a visually appealing foundation.
Step 2: Add an Animated Title Widget
Drag the Animated Title widget from Animation Addons into your hero section.

Enter your main headline, such as:
“We’re creative Interactive Design Studio”
This headline will become the focal point of your hero section.
Step 3: Enable Starter Animation
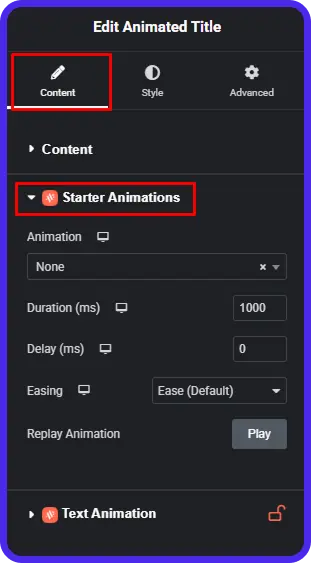
Navigate to:
Content → Starter Animations
This panel allows you to apply entrance animations without writing any custom CSS or JavaScript.
There are 3 animated title fields. We will apply 3 different animations to these 3 animated titles.
The animation will trigger automatically when the element becomes visible on the screen.
Step 4: Apply Different Animations to Each Animated Title
To create a more engaging and dynamic hero section, we’ll use three separate Animated Title widgets and assign a unique animation effect to each one. Using different animations helps establish a visual hierarchy, keeps visitors engaged, and makes the hero section feel more interactive.
For this example, we have three animated titles:
- We’re creative
- Interactive
- Design Studio
Each title will use a different animation style to create a layered animation experience.
First Animated Title: Reveal Animation
Select the first Animated Title widget containing the text “We’re creative”. Navigate to:
Content → Starter Animations → Animation
Choose Reveal from the animation dropdown.
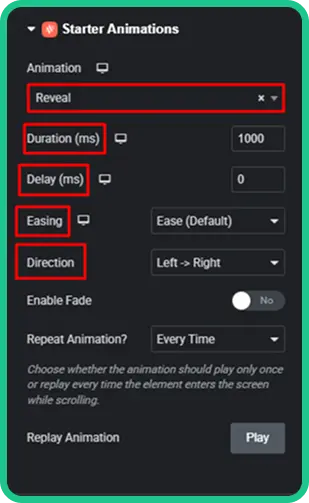
The Reveal animation smoothly uncovers the text from one direction, making it appear as though the title is being gradually exposed. This effect is perfect for introducing the main headline because it immediately grabs attention while maintaining a clean and professional appearance.
Recommended settings:
- Animation: Reveal
- Duration: 1000 ms
- Delay: 0 ms
- Direction: Left → Right
- Easing: Ease (Default)
This title should appear first, setting the stage for the rest of the hero section.
Second Animated Title: Typewriter Animation
Next, select the second Animated Title widget containing the text “Interactive”.
Navigate to:
Content → Text Animation
Choose Typewriter as the animation type.

The Typewriter effect displays characters one by one, simulating the experience of text being typed in real time. This animation naturally attracts attention and encourages visitors to focus on the message as it unfolds.
Since the first title has already appeared, the Typewriter animation creates a smooth progression and adds a sense of anticipation to the hero section.
Recommended settings:
- Animation Type: Typewriter
- Duration: 1000 ms
- Delay: 0 ms
- Easing: Ease (Default)
This effect works especially well for keywords or phrases you want visitors to notice.
Third Animated Title: Scale Animation
Finally, select the third Animated Title widget containing the text “Design Studio”.
Navigate to:
Content → Starter Animations → Animation
Choose Scale from the animation options.
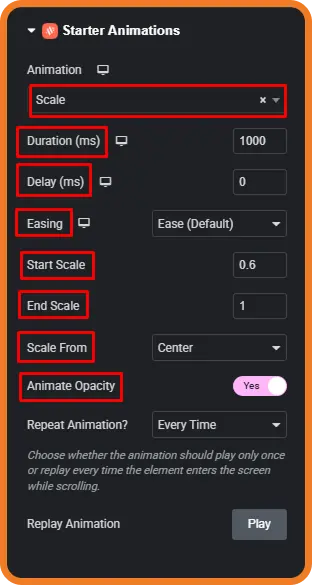
The Scale animation enlarges the text from a smaller size to its full size, creating a bold and impactful entrance. Since this is the final title in the sequence, the Scale effect helps reinforce the message and provides a strong visual finish.
Recommended settings:
- Animation: Scale
- Duration: 1000 ms
- Delay: 0 ms
- Easing: Ease (Default)
- Start Scale : 0.6
- End Scale : 1
- Scale From: Center
- Animate Opacity: Yes
The scaling effect gives the impression of growth and emphasis, making it ideal for highlighting the final and most prominent part of the headline.
Final Result
When visitors land on the page, the hero section animation will play in sequence. The first title smoothly reveals itself, the second title types out character by character, and the third title scales into view. This combination creates a polished storytelling effect that immediately captures attention and makes your hero section feel modern, interactive, and visually engaging.
Step 5: Configure Repeat Animation
For Repeat Animation, select:
Every Time
This setting allows the animation to replay whenever the visitor scrolls away from the section and returns to it.
If you prefer the animation to run only once, choose the appropriate one-time playback option instead.
Step 6: Preview and Test the Animation
Click Preview and test your hero section on:
- Desktop devices
- Tablets
- Mobile phones
Make sure the animation remains smooth and does not affect readability. A good hero section animation should enhance the user experience rather than distract from the content.
Tips for Creating High-Converting Hero Animations
A well-designed hero animation can capture attention, improve engagement, and encourage visitors to take action. However, effective animations are not just about visual appeal—they should support your website’s goals and enhance the user experience.
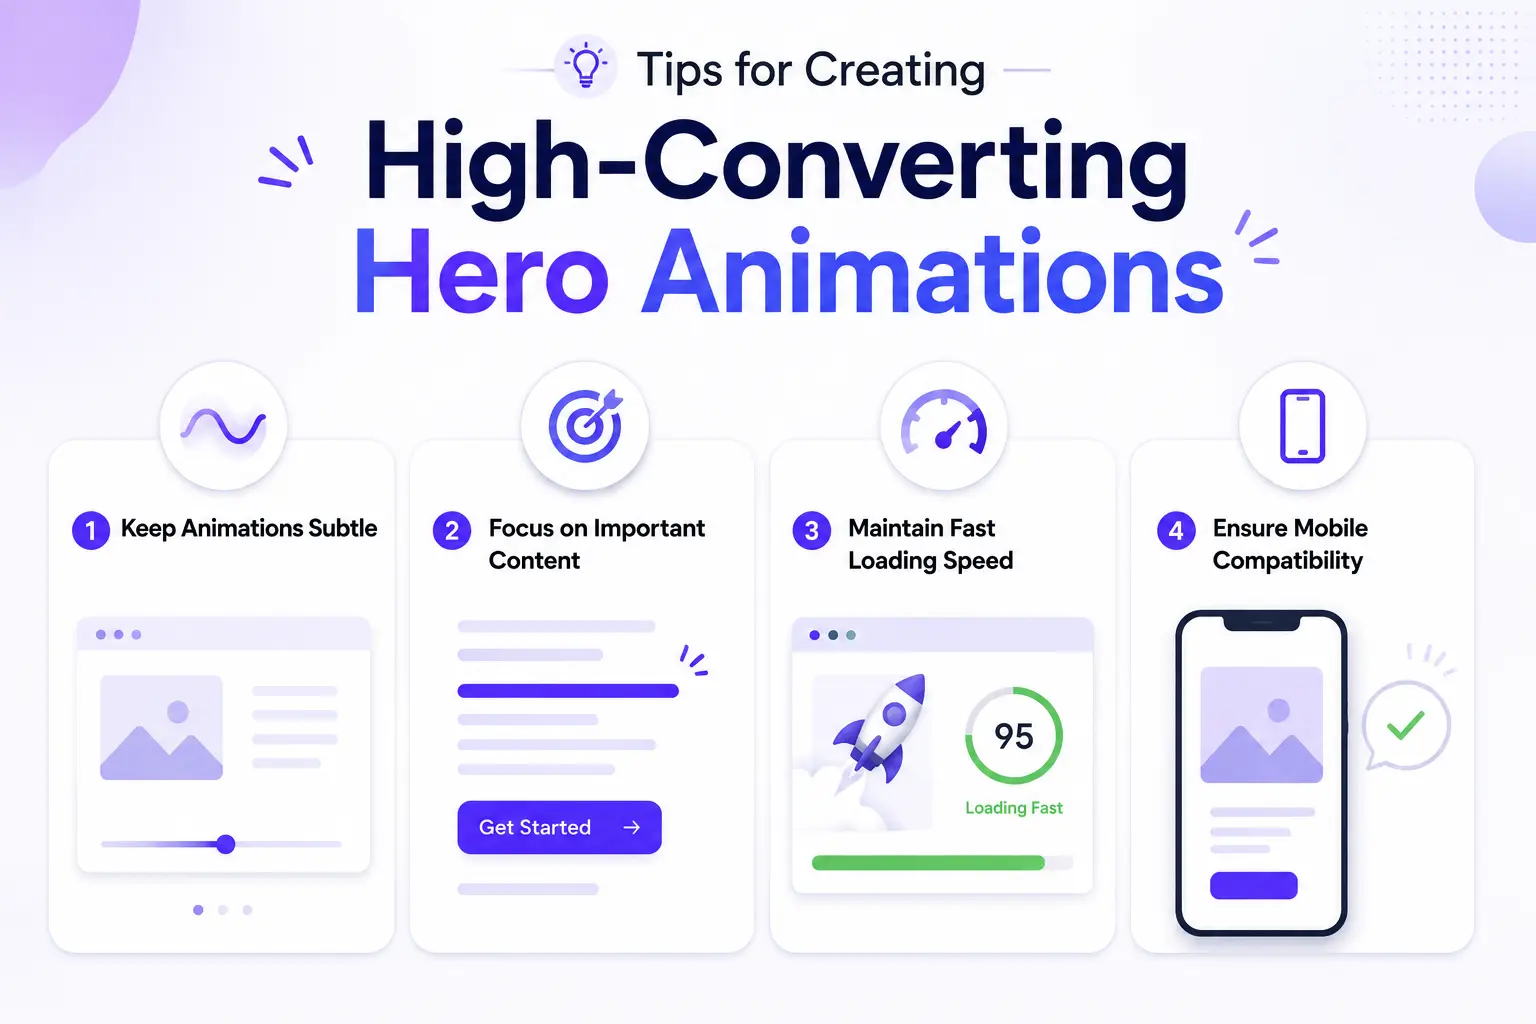
Keep Animations Subtle
Less is often more when it comes to hero animations. Overly dramatic effects can distract visitors from your message and make your website feel cluttered. Instead, use subtle animations such as fade-ins, reveals, or gentle slide effects that naturally draw attention without overwhelming the user.
Focus on Important Content
Your hero section should immediately communicate your value proposition. Apply animations to key elements such as the headline, subheading, and call-to-action button to guide visitors’ attention where it matters most. Every animation should serve a purpose and support your conversion goals.
Maintain Fast Loading Speed
Animations should enhance your website, not slow it down. Choose lightweight effects and avoid excessive animated elements that can impact performance. A fast-loading hero section improves user experience and reduces bounce rates.
Ensure Mobile Compatibility
Always test your hero animations on mobile devices and tablets. Animations should remain smooth, responsive, and easy to view on smaller screens. A mobile-friendly hero section ensures a consistent experience for all visitors, regardless of the device they use.
Common Mistakes to Avoid
Hero section animations can enhance user engagement when used correctly, but poor implementation can negatively impact user experience and conversion rates. Avoid these common mistakes to ensure your animations support your website’s goals.
Overusing Animations
Adding too many animations to every element in the hero section can overwhelm visitors and make the page feel chaotic. Instead of animating everything at once, focus on a few key elements such as the headline, image, or call-to-action button. A clean and intentional animation strategy creates a more professional appearance.
Slow Loading Effects
Heavy animations, large video backgrounds, and excessive motion effects can increase page load times. Visitors expect websites to load quickly, and delays can lead to higher bounce rates. Use lightweight animation effects that deliver visual impact without sacrificing performance.
Distracting Motion
Animations should guide attention, not steal it. Constant movement, excessive looping, or flashy transitions can distract users from your message and call-to-action. Choose smooth, subtle effects that complement your content rather than compete with it.
Ignoring Accessibility
Not all visitors interact with websites in the same way. Some users may be sensitive to motion effects or rely on assistive technologies. Ensure your animations do not hinder readability, navigation, or usability, and always prioritize a comfortable experience for every visitor.
Why Use Animation Addons for Hero Section Animations
Creating engaging hero section animations can significantly improve the visual appeal of your website, but achieving professional results often requires the right tools. Animation Addons makes the process simple, efficient, and accessible for Elementor users of all skill levels.
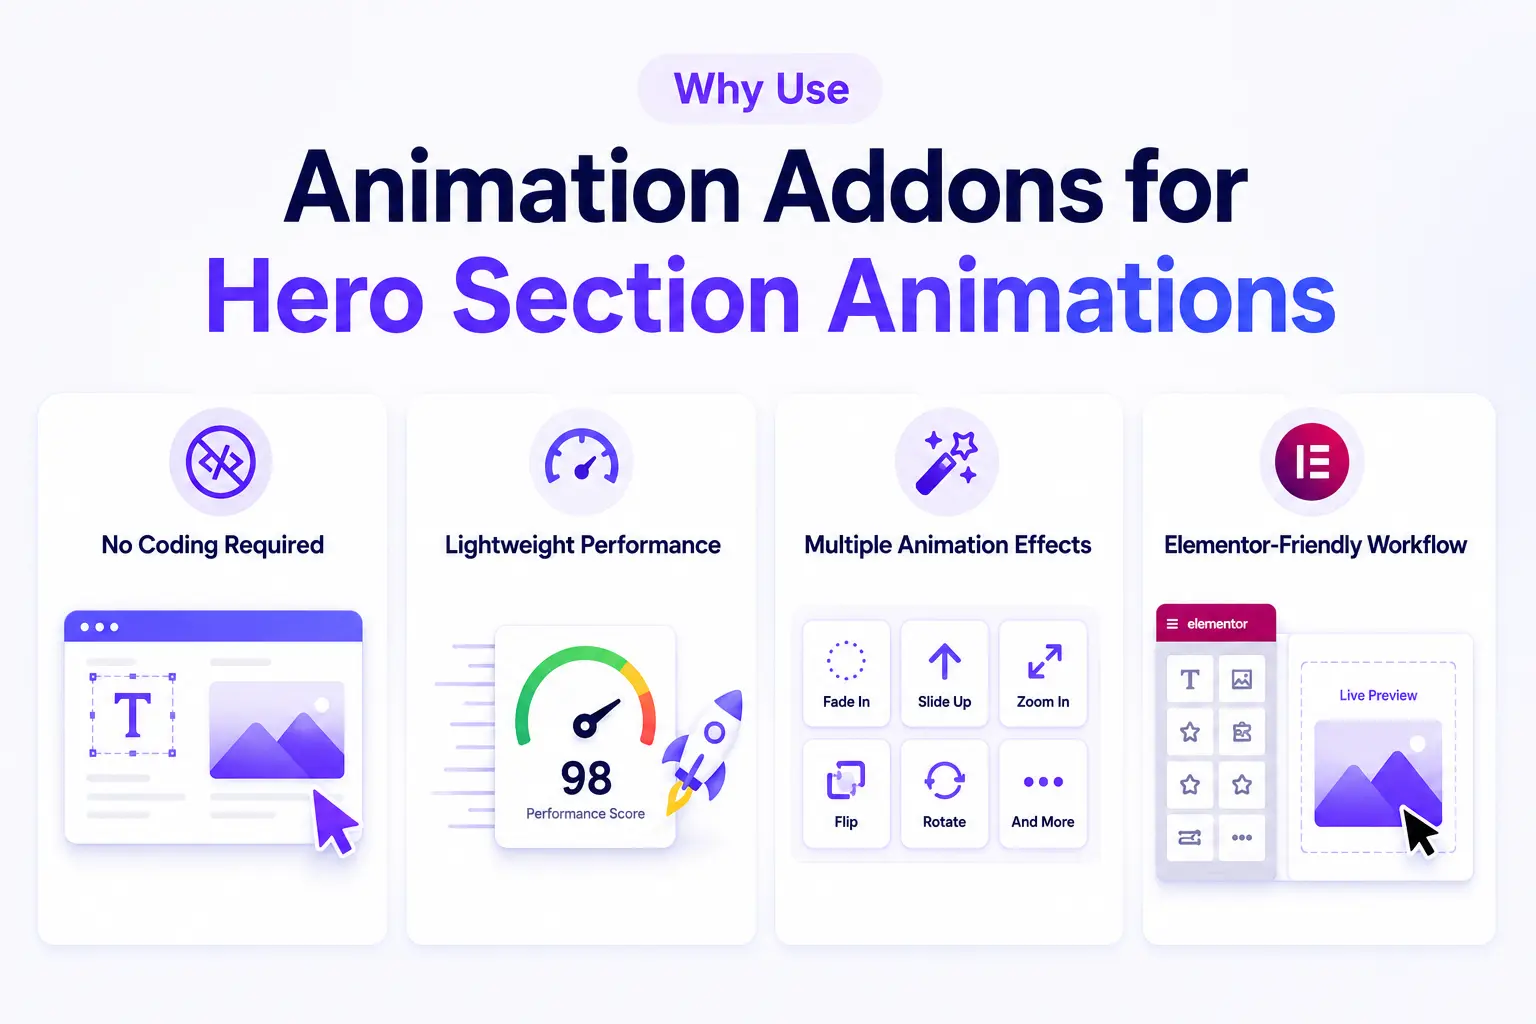
No Coding Required
One of the biggest advantages of Animation Addons is that it eliminates the need for custom code. You can create stunning hero section animations using an intuitive visual interface directly within Elementor. Whether you’re a beginner or an experienced designer, you can apply advanced animation effects with just a few clicks.
Lightweight Performance
Animations should enhance your website without affecting speed. Animation Addons is designed to deliver smooth animation effects while maintaining website performance. This helps ensure fast page loading times, better user experience, and improved search engine rankings.
Multiple Animation Effects
Animation Addons offers a wide variety of animation options, including reveal effects, fade-ins, slide animations, text animations, scroll-triggered effects, and interactive motion effects. This flexibility allows you to create unique hero sections that match your brand and design goals.
Elementor-Friendly Workflow
Since Animation Addons is built specifically for Elementor, it integrates seamlessly into your existing workflow. You can add, customize, preview, and adjust animations directly from the Elementor editor, making the design process faster and more efficient without switching between multiple tools.
Conclusion
A well-designed hero section can make a powerful first impression, and adding animations is one of the most effective ways to capture visitors’ attention from the moment they land on your website.
With Elementor and Animation Addons, you can create professional-looking hero section animations for free using a simple drag-and-drop workflow.
By following the best practices outlined in this guide and avoiding common mistakes, you can build hero sections that are visually appealing, performance-friendly, and conversion-focused.
FAQs
Can I create hero section animations without coding?
Yes, you can create impressive hero section animations without writing any code. Tools like Elementor and Animation Addons provide drag-and-drop controls that allow you to add and customize animations visually.
Are hero animations good for SEO?
Hero animations can indirectly benefit SEO by improving user engagement, increasing time on site, and creating a better user experience. However, animations should be optimized to avoid negatively affecting page speed.
Will animations affect website speed?
Animations can impact website performance if they are overly complex or poorly optimized. Using lightweight animation effects and performance-focused plugins helps maintain fast loading times.
Which free plugin is best for hero section animations?
Animation Addons is a great free option for creating hero section animations in Elementor. It offers various animation effects, easy customization, and a user-friendly workflow without requiring coding skills.
Can I use animations on mobile devices?
Yes, hero section animations can be used on mobile devices. It is important to test animations across different screen sizes to ensure they remain smooth, responsive, and do not affect usability or performance.
Leave a Reply