

If you have ever visited a website where the headline types itself out letter by letter right before your eyes, you already know the power of a typewriter effect. That single animation grabs attention instantly, makes a site feel alive and modern. The good news? You do not need any coding skills to add this effect to your WordPress site.
With the Typewriter widget in Animation Addons for Elementor, you can create a fully animated rotating headline in just a few minutes. Whether you are building a personal portfolio, a digital agency homepage or a freelancer site, this widget helps you show multiple value propositions in one clean, eye-catching headline.
In this guide, you will learn exactly how to set up the Typewriter widget in Elementor, configure its content settings and style it to match your brand. No code. No complexity. Just results.
What Is a Typewriter Effect on a Website?
A typewriter effect is a text animation where words appear one character at a time, as if someone is typing them in real time. Once one word finishes, it is deleted and replaced by the next word in a looping sequence.
For example, a hero section headline might read: “I am a Digital Designer” followed by “I am a Developer” and then “I am a Marketer,” each phrase replacing the last in a smooth, rhythmic loop.
The typewriter effect is also a smart space-saving tool. Instead of stacking three separate headline variations, you communicate all three ideas in one dynamic line. This keeps your layout clean while still delivering more information to your visitor.
What You Need Before You Start
Before jumping into the steps, make sure you have the following in place:
- WordPress installed and running on your website.
- Elementor (free version) installed and activated.
- Animation Addons for Elementor installed and activated.
The Typewriter widget is available in the free version, so no paid plan is required to follow this tutorial.
You can install Animation Addons directly from your WordPress dashboard or download it from WordPress.org.
Step-by-Step: How to Add Typewriter Widget in Elementor
Let’s break it down. We will go through each method one by one, so adding typewriter to your site is easy.
Step 1: Enable the Typewriter Widget in Animation Addons
After installing Animation Addons, the first thing to do is make sure the Typewriter widget is enabled in your plugin settings. This step takes only a moment and ensures the widget appears in your Elementor panel.
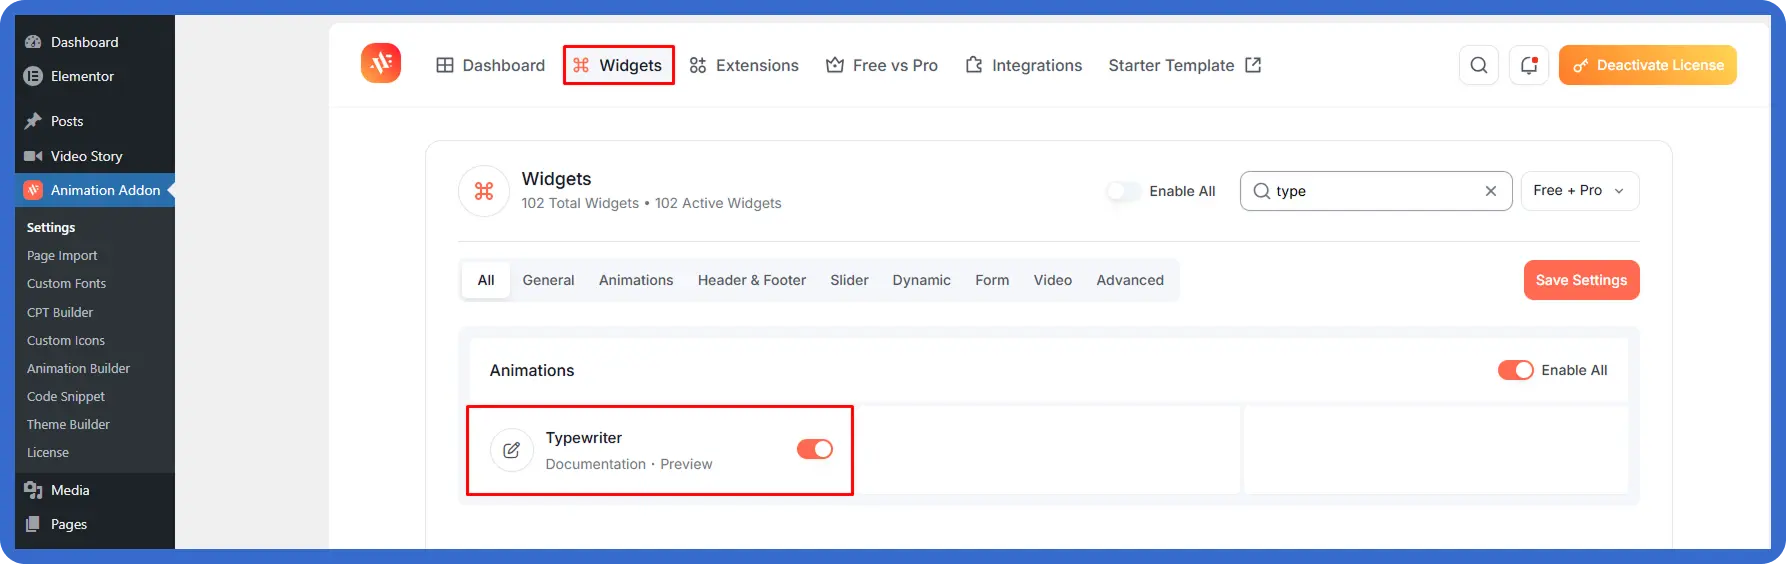
Go to your WordPress dashboard and click on Animation Addon in the left sidebar. This opens the Animation Addons dashboard. From the top navigation, click the Widgets tab. You will see a search bar on the right side of the Widgets page. Type “type” into the search field. The Typewriter widget will appear under the Animations section.
Check that the toggle next to it is switched on (shown in orange). Once it is enabled, click Save Settings.
Step 2: Open Your Page in Elementor
With the Typewriter widget enabled, the next step is to open the page where you want to add the animation. If you are starting fresh, create a new page by going to Pages and clicking Add New. Give the page a title, then click Edit with Elementor to open the Elementor editor.
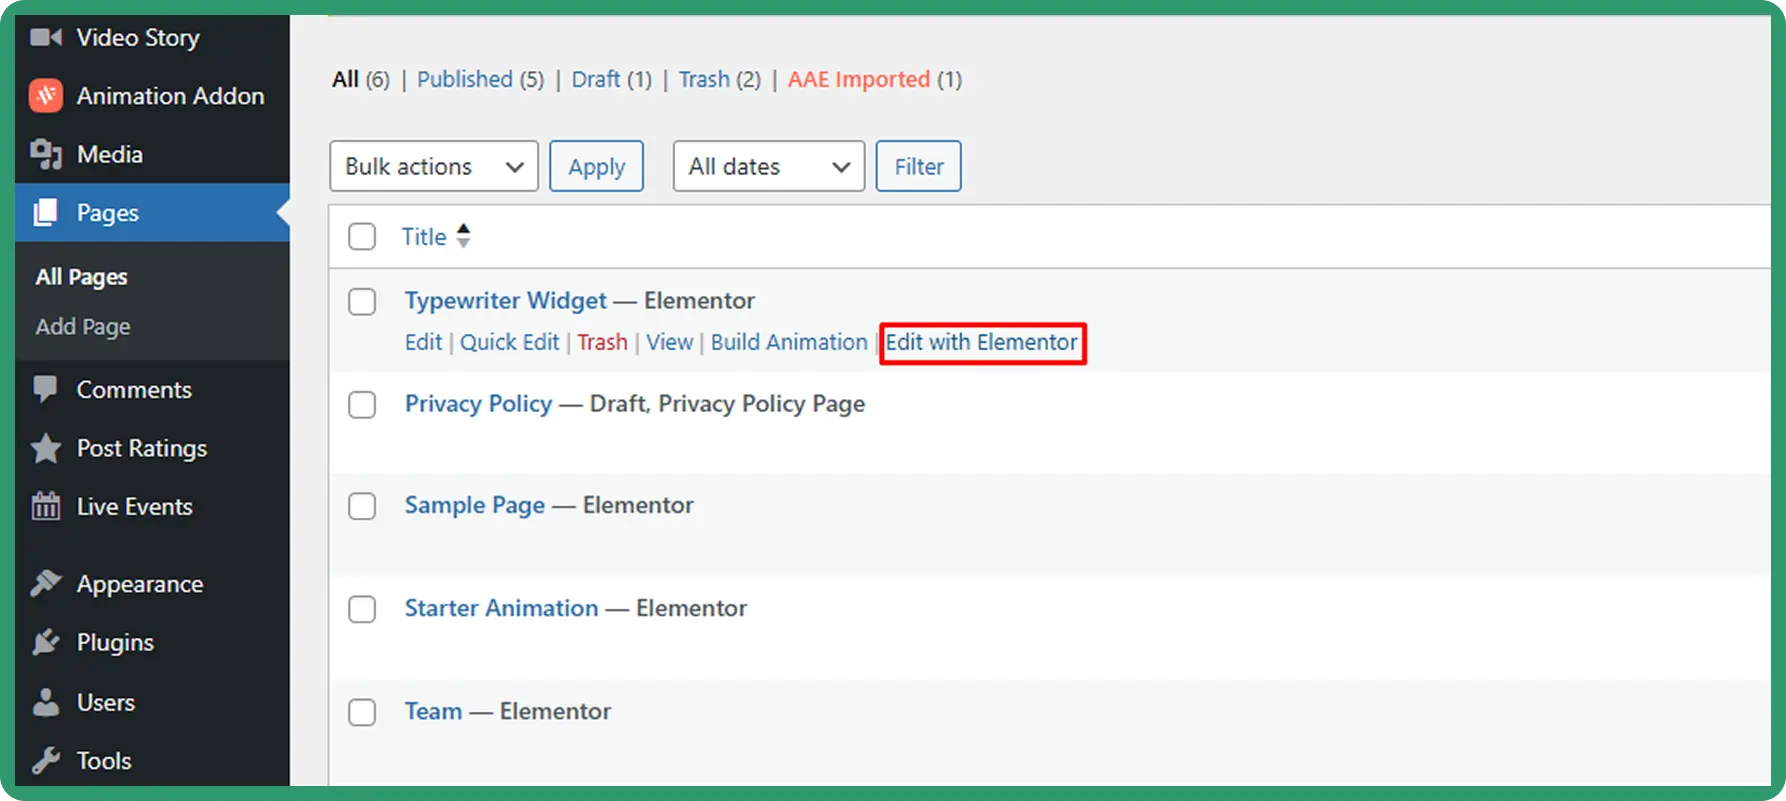
If you are working on an existing page, go to Pages in your WordPress dashboard, find the page you want to edit, hover over it, and click Edit with Elementor. This will load the page in the visual Elementor editor where you can drag and drop widgets freely.
Step 3: Add the Typewriter Widget to Your Page
Inside the Elementor editor, click the plus icon on the left panel to open the widget library. In the search bar at the top of the panel, type “type” and the Typewriter widget will appear. You will recognize it by the “Abc” icon with the blinking cursor and the Animation Addons badge.
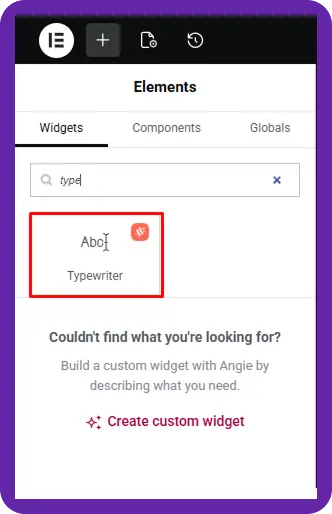
Drag the Typewriter widget and drop it onto your desired section or column on the page. Once placed, the widget will appear on your canvas and the settings panel on the left will switch to the Edit Typewriter options. You are now ready to configure the content.
Step 4: Configure the Content Settings
The Content tab is where you define what text the widget displays. Click on the Content tab in the left panel if it is not already selected. You will see the following fields:
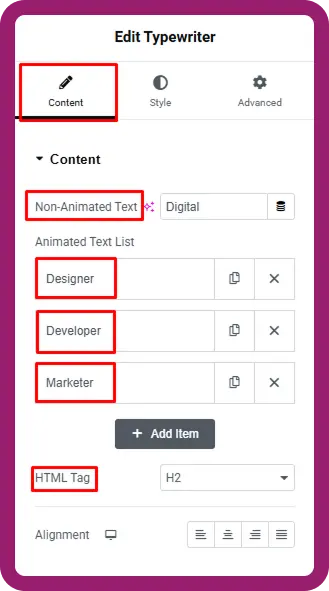
Non-Animated Text — This is the static part of your headline that stays fixed. For example, if your headline reads “I am a Digital Designer,” the word “Digital” is a separate animation. The non-animated part could be “I am a” and it will remain visible throughout all cycles.
Animated Text List — These are the words or phrases that rotate. You can add as many items as you like using the + Add Item button. Each item will appear in sequence, get typed out, pause, get deleted, and then be replaced by the next item in the list.
HTML Tag — This setting controls the heading level of the animated text. You can choose H1, H2, H3, H4, H5, H6, or a standard paragraph tag. For hero sections and main headlines, H1 or H2 is recommended for both visual hierarchy and SEO.
Alignment — Choose whether you want the text aligned to the left, center, or right. This should match the overall layout of the section you are designing.
Using the example shown in the images: the Non-Animated Text is set to “Digital” and the Animated Text List includes “Designer,” “Developer,” and “Marketer.” The HTML Tag is set to H2. This creates a clean, professional rotating headline that clearly communicates three roles in one line.
Step 5: Style the Typewriter Text to Match Your Brand
Once the content is set up, click the Style tab in the left panel to customize how the text looks. The Style tab gives you three main options:
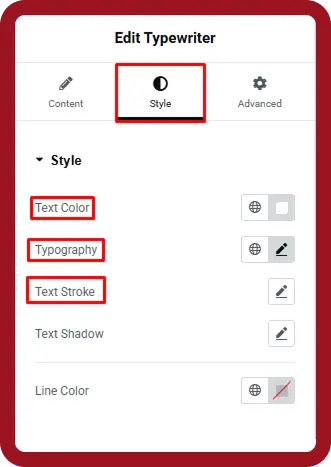
Text Color — Set the color of the entire typewriter text. Choose a color that works well against your background and aligns with your brand palette.
Typography — Control the font family, size, weight, line height, and letter spacing. This is where you make the text look like it truly belongs to your design.
Text Stroke — Add an outline to the text characters. This is a creative styling option that can make the animated words stand out more dramatically, especially on image or video backgrounds.
Line Color — This controls the color of the blinking cursor line that appears while the text is being typed.
Take time here to match the typography to the rest of your page design. Consistent font sizing between the static text and the animated text will make the headline look like one cohesive unit rather than two separate elements.
Want to explore more text animation options beyond the typewriter effect? Check out the Text Animation extension in Animation Addons for GSAP-powered split text, mask reveals, and scroll-triggered word animations.
Step 6: Preview and Publish Your Page
If everything looks good, click the Publish button or the Update button if you are editing an existing page. Your typewriter animation is now live on your website.
Best Practices for the Typewriter Effect
A typewriter animation works best when it is used thoughtfully. Follow these practices to get the most out of it:
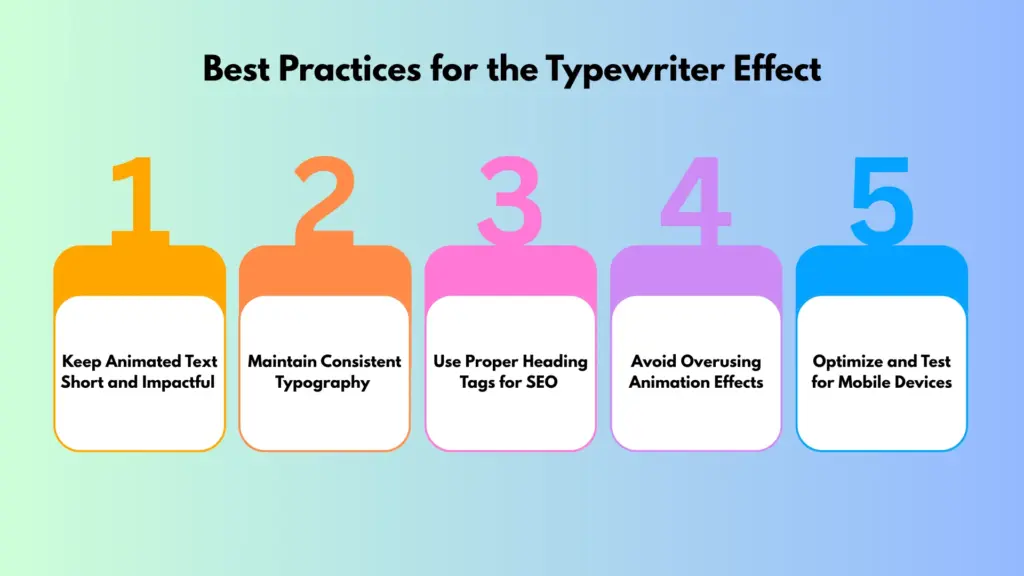
Keep Animated Text Short and Impactful
Keep animated words short and punchy. One to three words per item works best. Longer phrases take more time to type and delete, which can feel slow or distracting.
Maintain Consistent Typography
Match the static text and animated text in font size and style. Inconsistent sizing makes the headline look broken. The Style tab is used to keep everything uniform.
Use Proper Heading Tags for SEO
When you write content, use the H1 or H2 tag for hero headlines. This helps with on-page SEO because search engines pay attention to heading tags when indexing your content.
Avoid Overusing Animation Effects
Avoid using the typewriter effect on multiple sections of the same page. One instance per page is usually enough. Too many animated elements compete for attention and reduce the impact of each one.
Optimize and Test for Mobile Devices
Test the animation on mobile. Open your site on a phone after publishing to make sure the text size and alignment work well on smaller screens.
Common Mistakes to Avoid
As typewriter widget is really a funny widget, but there are some consequences while you are using it. These are –
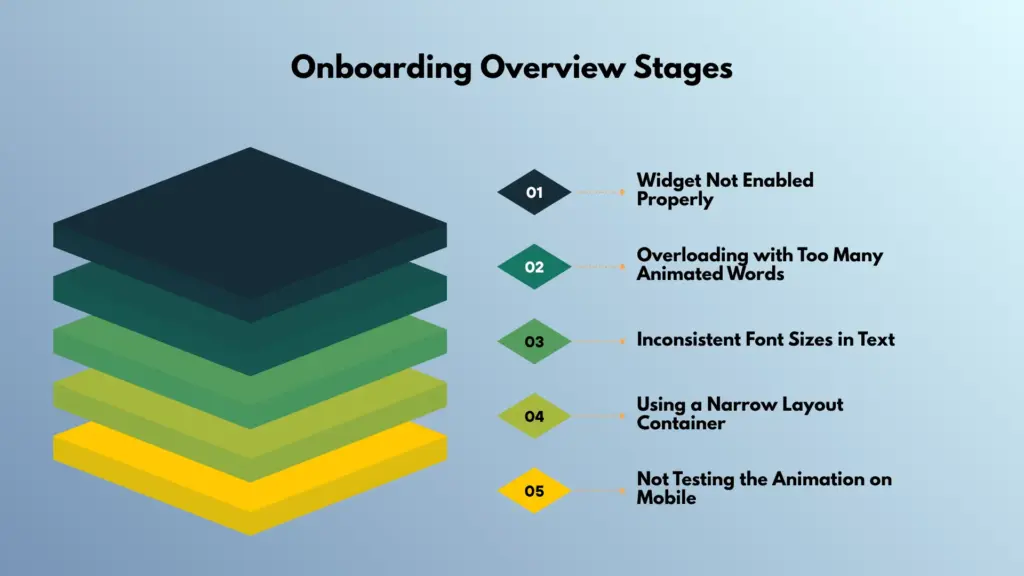
Widget Not Enabled Properly
Forgetting to enable the widget. If the Typewriter widget does not appear in your Elementor panel, make sure the toggle is switched on and saved.
Overloading with Too Many Animated Words
Using too many animated words. Adding six or seven items to the list makes the animation feel repetitive and slow. Stick to three or four items for a clean, engaging loop.
Inconsistent Font Sizes in Text
Mismatching font sizes between the static and animated text. This creates a visual disconnect in your headline. Always set the same font size for both parts in the Style tab.
Using a Narrow Layout Container
Placing the widget inside a container that is too narrow. If the layout column is small, the typed text may wrap to a second line mid-animation, breaking the visual flow. Use a full-width section for hero headlines.
Not Testing the Animation on Mobile
Skipping the mobile preview. Always check how the animation looks on smaller screens before publishing. What looks perfect on desktop may need a smaller font size on mobile.
Where the Typewriter Widget Works Best
The Typewriter widget is flexible enough to work across many different website types. Here are the most common and effective use cases:
Portfolio and Personal Websites
Creative professionals, developers, and designers often use the typewriter effect in their hero section to introduce themselves. Instead of picking one title, they can rotate through all of their skills. Each phrase reinforces a different dimension of their work.
Digital Agency Homepages
Agencies can use the widget to highlight their service areas in the main headline. A line that rotates between “Web Design,” “SEO,” and “Paid Ads” tells visitors exactly what the agency does without requiring them to scroll to find out.
SaaS and Product Landing Pages
Product teams can showcase different benefits of their tool in a single animated headline. Rotating phrases like “Fast,” “Reliable,” and “Affordable” communicate multiple selling points instantly, keeping the hero section clean and focused.
Small Business Websites
Local businesses can use the typewriter effect to rotate through their key services or target audiences. A salon, for example, might display “Hair,” “Nails,” and “Skin” as rotating words under a static headline like “We specialize in.”
Final Thoughts
The typewriter effect is one of the most effective yet simple animations you can add to a WordPress website. It communicates more in less space, keeps visitors engaged, and gives your site a polished, modern feel without requiring any design or coding expertise.
With Animation Addons for Elementor, setting up a typewriter animation takes just a few minutes. You define the static text, add your rotating words, choose a heading tag, and style it to match your brand. That is all it takes to turn a flat headline into a dynamic, attention-holding centerpiece.
Ready to try it yourself? Install Animation Addons for free and add the Typewriter widget to your Elementor page today.
Leave a Reply