


 Cupon Code Applied
Images can make your website look stunning, but when your gallery starts growing, things can quickly get messy. Visitors struggle to find what they’re looking for, and that can hurt both user experience and engagement.
That’s where a gallery filter comes in. It helps you organize your images into categories, making your content easier to explore and more enjoyable to browse.
In this guide, you’ll learn how to create a gallery filter in WordPress step by step. Whether you prefer a simple plugin or want full control using custom animation, you’ll find the right method for your needs.
When Should You Use Gallery Filter in WordPress?
A gallery filter is useful when your website has a lot of visual content. It keeps everything organized and easy to explore.
You should use a gallery filter if:
- You have a portfolio website
- You showcase projects or case studies
- You run a photography or design website
- You sell products and want category-based filtering
- You want to improve user experience and engagement
If your gallery has only a few images, a filter may not be necessary.
💡
Pro Tip:
If users need more than 2–3 clicks to find content, adding a filter will instantly improve usability.
Since you understand when to use a gallery filter, let’s look at how to add one in WordPress.
Ways To Create Gallery Filter in WordPress
You may find various methods on the internet to add a gallery filter in WordPress. However, two methods stand out from the rest:
- Animation Addons (WordPress Plugin)
- GSAP Library (Custom Code)
If you don’t like coding, use a WordPress plugin. It is simple and easy. If you want full control over your animation, go with GSAP.
Your choice depends on your skills, time, and what you need. Let’s look at both:
Animation Addons (WordPress Plugin)
Animation Addons gives you everything you need to build animated websites without any hassle.
You get lots of templates, pages, and sections ready to use. Just pick what you like, and your website will be done fast. No coding needed at all. It takes care of all the technical stuff, so you do not have to worry about anything.
It works great for a new website or an old one. Beginners and designers love it because it is simple and it just works.
- Note
- Always keep your plugin updated to avoid bugs and compatibility issues with WordPress.
GSAP Library (Custom Code)
GSAP gives you total freedom when building a gallery filter that truly stands out.
Every item can move, fade, or appear exactly how you want. The transitions feel buttery smooth, and your visitors will notice the difference right away. You get to control everything. Speed, timing, and how it looks on any device. You are not stuck with boring default settings like most other tools.
The only catch is that GSAP works best for people who know JavaScript well. It takes some patience and practice to get things just right. But once you nail it, your gallery filter will look clean, sharp, and totally professional.
Ready to build one? Let’s jump into the step-by-step guide coming up next.
How To Add a Gallery Filter Effect in WordPress
Let’s break it down. We will go through each method one by one, so adding a gallery filter to your site is easy.
Animation Addons
Getting started with Animation Addons is really easy. Everything comes ready for you, so you only need to change a few things and you are good to go.
Want to make it look your own way? No problem. You can customize it however you like.
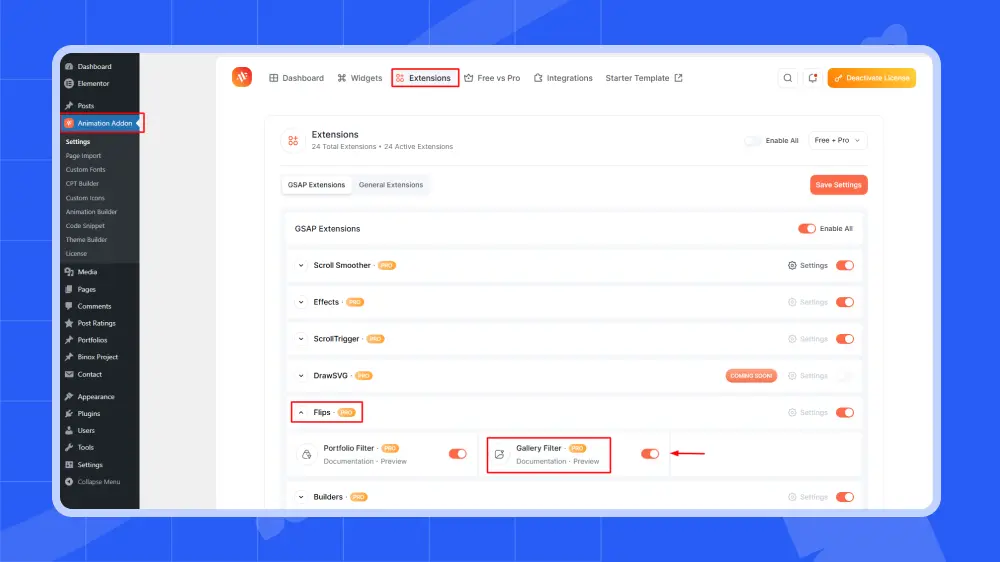
Just make sure the Animation Addons plugin is installed on your WordPress site before you begin. Also, do not forget to turn on the extension inside the plugin settings.
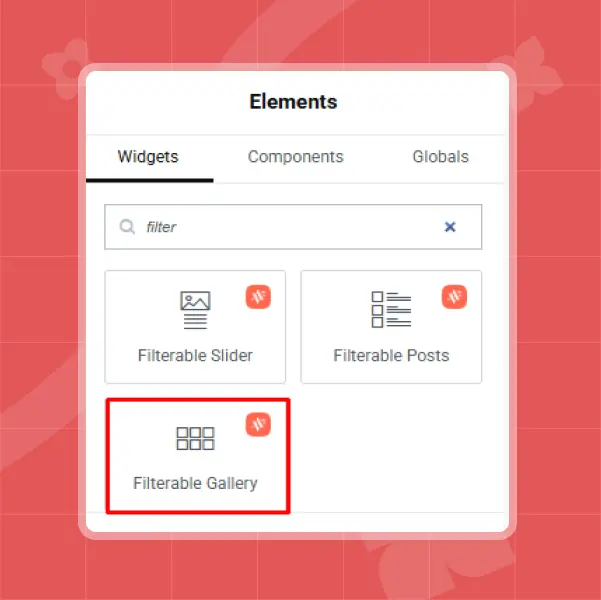
Step 1: Insert and Activate Filterable Gallery
First, click on the ‘+’ icon, then type “Filterable Gallery” in the search box.
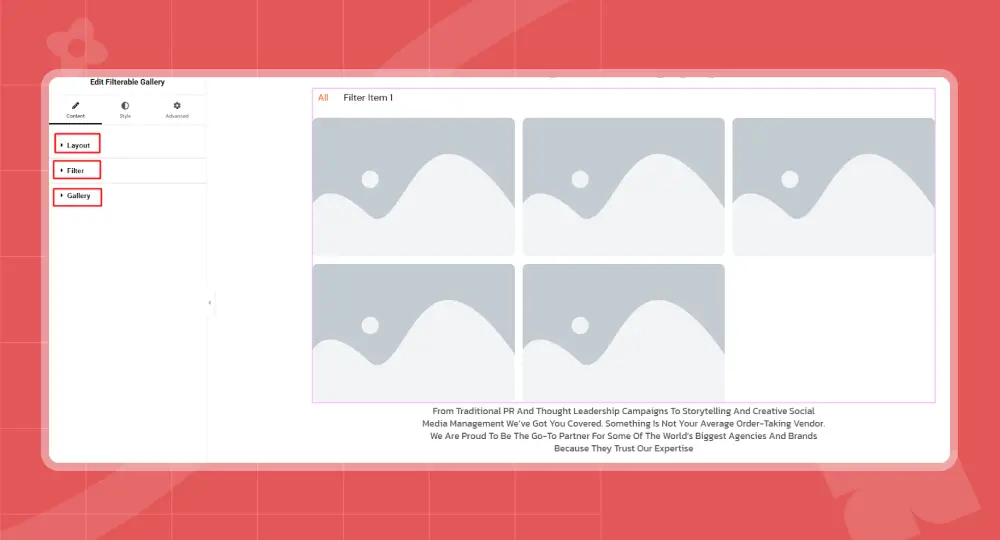
Once you click on the Filterable gallery, you will find three options: Layer, Filter, and Gallery. Each setting helps you improve your gallery filter design. For example, I’ll start with Layer, but you can start with any of them.
Step 2: Adjust Layout Style and Columns
Choose a layout style to decide how your images will be shown, then pick how many columns you want to display items in each row. This makes your gallery look neat and well-arranged.
Layout
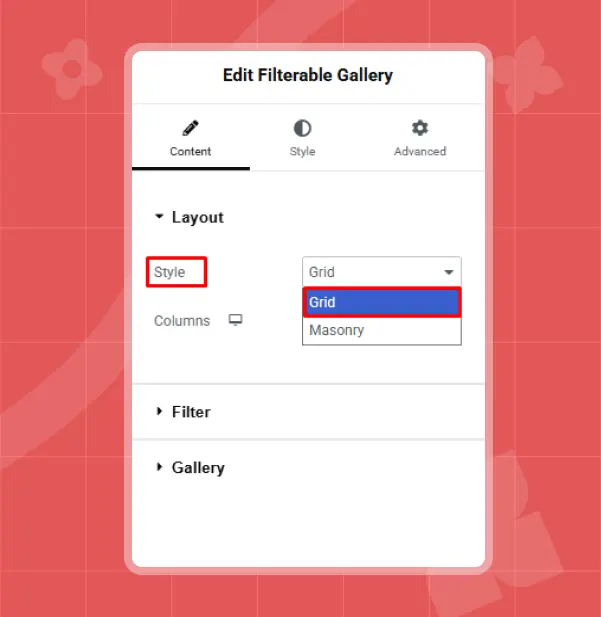
Now, in the Layout Style section, you will find two options: Grid and Masonry. The Grid setting ensures that all gallery items are placed in equal-sized rows and columns.
On the other hand, Masonry arranges items in columns, but their heights can vary based on the actual height of the images. For example, I chose Grid, but you can pick either one based on your preference.
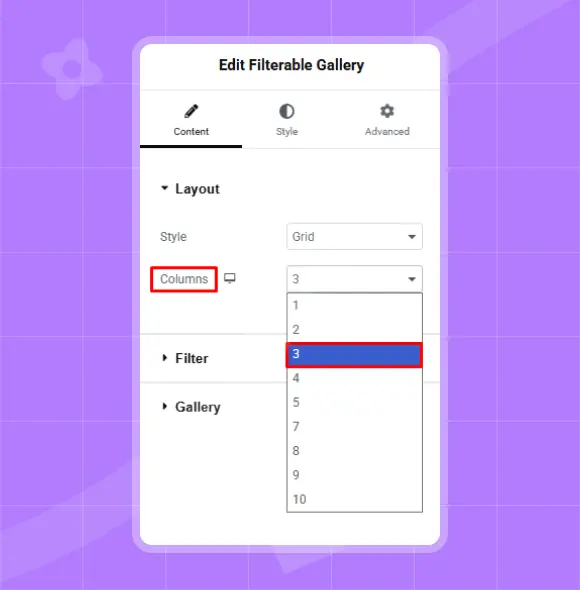
Column
The Column setting lets you choose how many items line up in each row of your gallery. For example, I selected 3, but you can choose any number you prefer.
💡
Pro Tip:
Use 3–4 columns for desktop and fewer columns for mobile to maintain a clean layout.
Step 3: Set Up Filters and Gallery Items
Filters let you organize your gallery so visitors can easily find what they’re looking for. Just add your categories, link them to each item, and set up the layout the way you want.
Filter
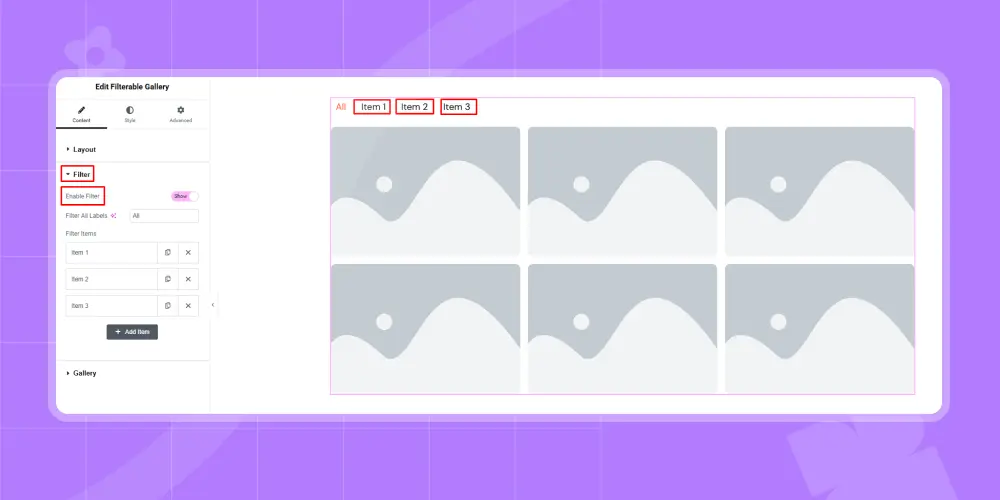
Enable Filter: The Enable Filter setting has two options: Show and Hide. If you select Hide, the filter item settings won’t be visible. However, if you select Show, the filter item settings will appear.
Filter All labels: In the Filter All Labels setting, you’ll see options like ‘All’ set as the default, but you can change it to something like Show All, Everything, or All Projects. In this case, I kept it as the default, but you can customize it however you prefer.
Filter Items: The Filter Items settings let you manage and organize the categories (or filters) that appear above your gallery. You can also set a title based on your preference.
For example, I named it Item 1, Item 2, and Item 3 in categories.
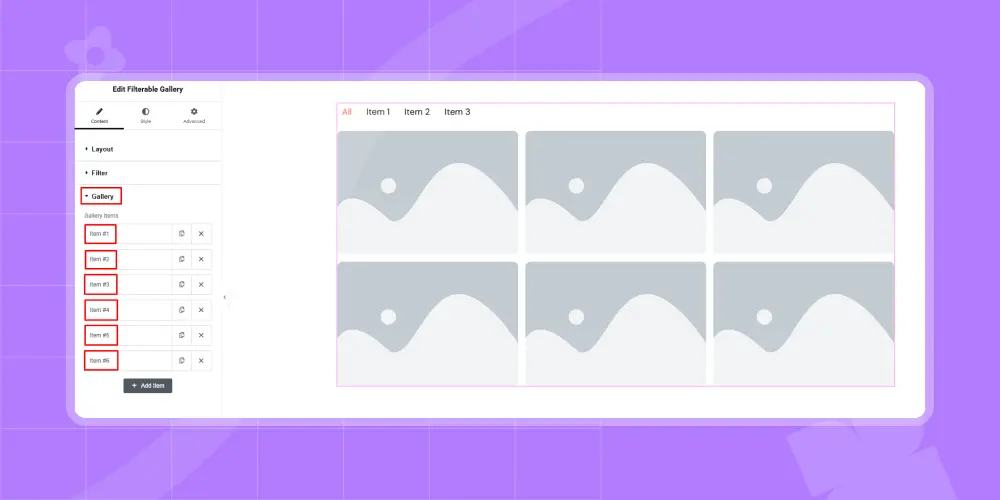
Gallery
In the Gallery settings, you can add and manage the images or items that will appear in the gallery. You can include multiple images for each item.
For example, I set it to show three or four images per item, but you can add as many as you like.
Filter Name: After that, click on any item and enter the filter name you already set in the Filter Items settings.
In my case, I used “Item 1,” “Item 2,” and “Item 3,” so I will enter the names “Item 1,” “Item 2,” and “Item 3” three or four times in the Gallery Filter Name field for each item I want to display under that filter.
Type: In type settings, you will find options like Image, Audio, and Video. For example, I have picked an image since I like to show my audience to image gallery on my site. However, you can choose anything.
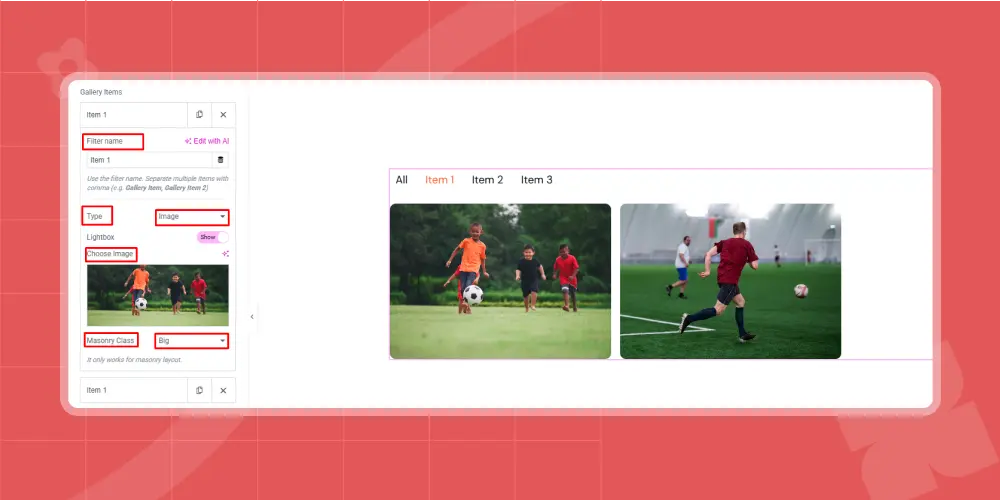
Lightbox: The Lightbox setting lets you control whether images open in a pop-up (overlay view) when clicked. If you turn it on, the image will open in a pop-up.
If you keep it off, the image won’t open in a pop-up. I set it to Show, but you can choose whatever works best for you.
Masonry Class: It offers four options: Default, Big, Horizontal, and Vertical. If you choose Default, the items will stay at their regular size. Big makes the items larger than usual. Horizontal makes the items wider but keeps the height the same.
Vertical makes the items taller and stretches them across two rows. For example, I chose Big, but you can pick any option that works best for you.
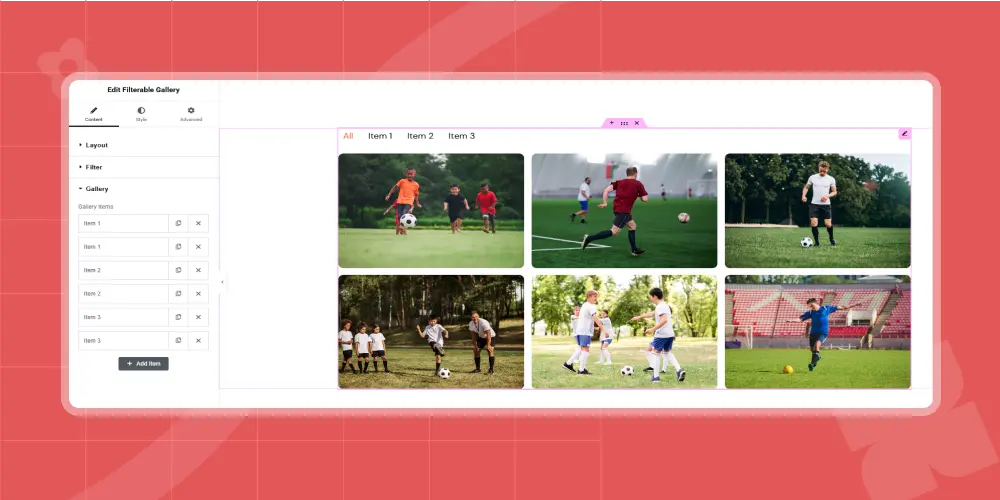
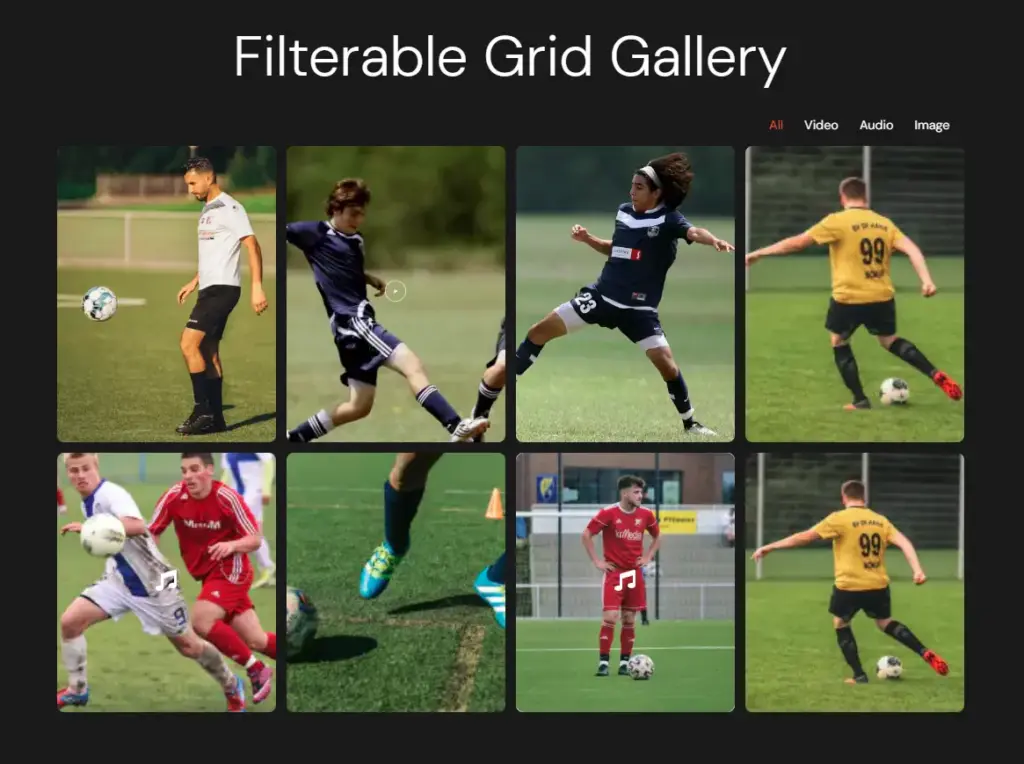
Final Result
GSAP (Custom Code)
If you want smooth and professional animations for your gallery filter, you can use GSAP (GreenSock Animation Platform). It helps you create fast and fluid transitions when users switch between filters.
1. Add GSAP Library
First, include the GSAP CDN in your site. You can add this inside your theme file or using a custom code plugin:
<script src="https://cdnjs.cloudflare.com/ajax/libs/gsap/3.12.5/gsap.min.js"></script>
2. Basic HTML Structure
Make sure your gallery items have filter categories:
					<div class="filter-buttons">

 <button data-filter="all">All</button>

 <button data-filter="item1">Item 1</button>

 <button data-filter="item2">Item 2</button>

 <button data-filter="item3">Item 3</button>

</div>

<div class="gallery">

 <div class="gallery-item" data-category="item1">Image 1</div>

 <div class="gallery-item" data-category="item2">Image 2</div>

 <div class="gallery-item" data-category="item3">Image 3</div>

 <div class="gallery-item" data-category="item1">Image 4</div>

</div>
3. Add GSAP Filter Animation Script
					<script>

const buttons = document.querySelectorAll(".filter-buttons button");

const items = document.querySelectorAll(".gallery-item");

buttons.forEach(button => {

 button.addEventListener("click", () => {

   const filter = button.getAttribute("data-filter");

   items.forEach(item => {

     const category = item.getAttribute("data-category");

     if (filter === "all" || category === filter) {

       gsap.to(item, {

         opacity: 1,

         scale: 1,

         duration: 0.5,

         display: "block"

       });

     } else {

       gsap.to(item, {

         opacity: 0,

         scale: 0.8,

         duration: 0.5,

         onComplete: () => {

           item.style.display = "none";

         }

       });

     }

   });

 });

});

</script>
4. Optional: Add Smooth Stagger Effect
					gsap.from(".gallery-item", {

 opacity: 0,

 y: 30,

 stagger: 0.1,

 duration: 0.6

});
This creates a smooth entrance animation when the gallery loads. Now your gallery smoothly shows and hides items with clean, modern animations.
Performance Tips for Gallery Filter Animations
To keep your gallery filter fast, smooth, and user-friendly, it’s important to focus on both design and technical performance. A well-optimized gallery not only looks better but also improves SEO and user experience.
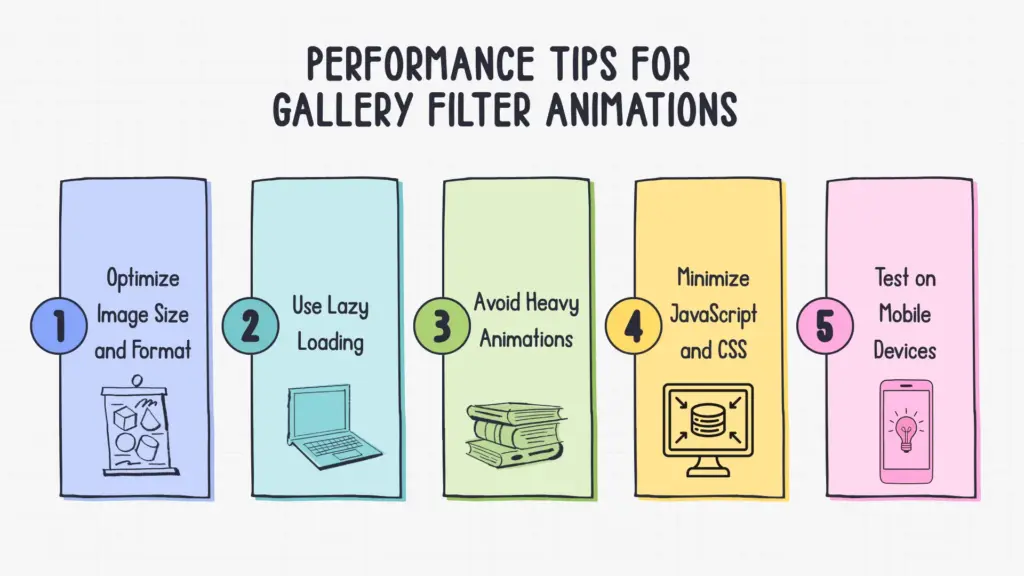
Optimize Image Size and Format
Large images are one of the biggest reasons websites slow down. Always compress your images before uploading them.
Use modern formats like WebP, which provide high quality at smaller file sizes. Also, resize images to the exact dimensions needed instead of uploading oversized files and scaling them down with CSS.
Use Lazy Loading
Lazy loading ensures that images load only when they are about to appear on the user’s screen. This reduces the initial page load time and saves bandwidth.
Most modern WordPress setups support lazy loading by default, but you can enhance it further with plugins or custom scripts.
Avoid Heavy Animations
Animations can improve user experience, but too many effects or complex transitions can hurt performance. Stick to simple animations like fade, scale, or slight movement. Avoid stacking multiple animations at once, especially on large galleries.
Minimize JavaScript and CSS
Extra code can slow down your website. Remove unused CSS and JavaScript files, and minify the ones you keep. If you are using animation libraries, only load the parts you actually need instead of the full library.
Test on Mobile Devices
A gallery that works smoothly on a desktop may lag on mobile devices. Always test your gallery on different screen sizes and devices. Make sure animations are smooth, images load quickly, and touch interactions feel responsive.
By following these tips, your gallery filter will stay fast, responsive, and optimized for both users and search engines.
Common Mistake To Avoid
Creating a gallery filter in WordPress can improve user experience, but small mistakes can hurt performance, usability, and even SEO. Here are the most common issues you should avoid:
Using Too Many Animations
Animations can make your gallery look modern, but overusing them can have the opposite effect. Too many transitions, delays, or complex effects can slow down your website and distract users from the actual content.
Keep your animations simple and smooth so they enhance the experience instead of overwhelming it.
Not Optimizing Images
Uploading large, uncompressed images is one of the biggest performance mistakes. Heavy images increase page load time, which can negatively affect both user experience and search rankings.
Always compress images, use the correct dimensions, and choose modern formats like WebP to keep your gallery lightweight and fast.
Poor Category Structure
A filterable gallery depends on clear and logical categories. If your categories are confusing, too similar, or poorly labeled, users will struggle to find what they’re looking for.
Plan your category structure carefully and use simple, descriptive names that make navigation easy.
Ignoring Mobile Responsiveness
Many users will view your gallery on mobile devices. If your filter buttons are hard to tap or your layout breaks on smaller screens, it creates a poor experience. Make sure your gallery is fully responsive, with smooth animations and properly aligned elements across all devices.
Overloading with Plugins
Using too many plugins to create or enhance your gallery can slow down your website and lead to compatibility issues. Each plugin adds extra code and potential conflicts.
Try to use lightweight, well-coded plugins and avoid installing multiple plugins that do similar tasks.
By avoiding these common mistakes, you can build a gallery filter that is clean, fast, and easy to use, while also maintaining strong performance and SEO benefits.
Wrap Up
Creating a gallery filter in WordPress is a smart way to organize your content and improve user experience. If you want a quick and easy setup without coding, a plugin is the best choice. But if you need full control over animations and design, GSAP gives you the flexibility to create something unique and professional.
Just remember to keep performance in mind. Optimize your images, avoid heavy animations, and make sure everything works smoothly on mobile devices. A well-built gallery filter not only looks good but also helps users find what they need faster and keeps them engaged on your site.
FAQs
What is a gallery filter in WordPress?
A gallery filter lets users sort and view images based on categories. It helps organize large galleries and makes browsing easier.
Which method is better: plugin or GSAP?
It depends on your needs. Plugins are easy and fast to use, while GSAP offers more control and advanced animation options.
Will a gallery filter slow down my website?
It can if not optimized properly. Using compressed images, simple animations, and clean code will keep your site fast.
Can I use a gallery filter on mobile devices?
Yes, as long as your gallery is responsive. Make sure buttons are easy to tap and layouts adjust properly to smaller screens.

Leave a Reply