Designers know one secret: motion sells. A smooth text reveal or subtle slide-up effect can make even a simple design site feel premium.
Here’s the good news, you don’t need GSAP scripts or developer help. Animating headings in WordPress using Elementor is a powerful way to capture attention and make your content feel more dynamic and engaging. Modern websites rely on movement to guide users, highlight key messages, and create a memorable browsing experience. With Elementor’s built-in animation tools and customization options, you can bring headings to life using fade-ins, slide-ins, rotations, or more advanced effects. The best part is that you don’t need coding skills, everything can be done visually through Elementor’s intuitive interface.
In this guide, I’ll show you the no-code way to animate headings in WordPress and Elementor so your designs look sharp, modern, and alive.
Before You Begin Know Your Animation Options
Before you add animations, you should know the different effects for your headings. Each effect does something different. It can change how people see your content. Here are the main options:
Split-Text Animations
These animations let you move each letter or word instead of the whole heading at once. For example, every letter can fade, slide, or bounce one after another. This style works great for titles, product names, or any text you want to stand out.
You’ll often see it in hero sections or landing pages to give a smooth and polished feel.
Text Reveal Motion
Text reveal animations let your headings appear gradually, like they are being uncovered or typed out. You might see effects such as a line moving away, text fading in, or letters appearing one by one.
This draws attention to the heading first and makes new content more engaging, keeping your site feeling modern without being overwhelming.
These text animations are perfect for sections where content unfolds gradually, for portfolio or case study headings that need emphasis, or anywhere you want to make text stand out clearly.
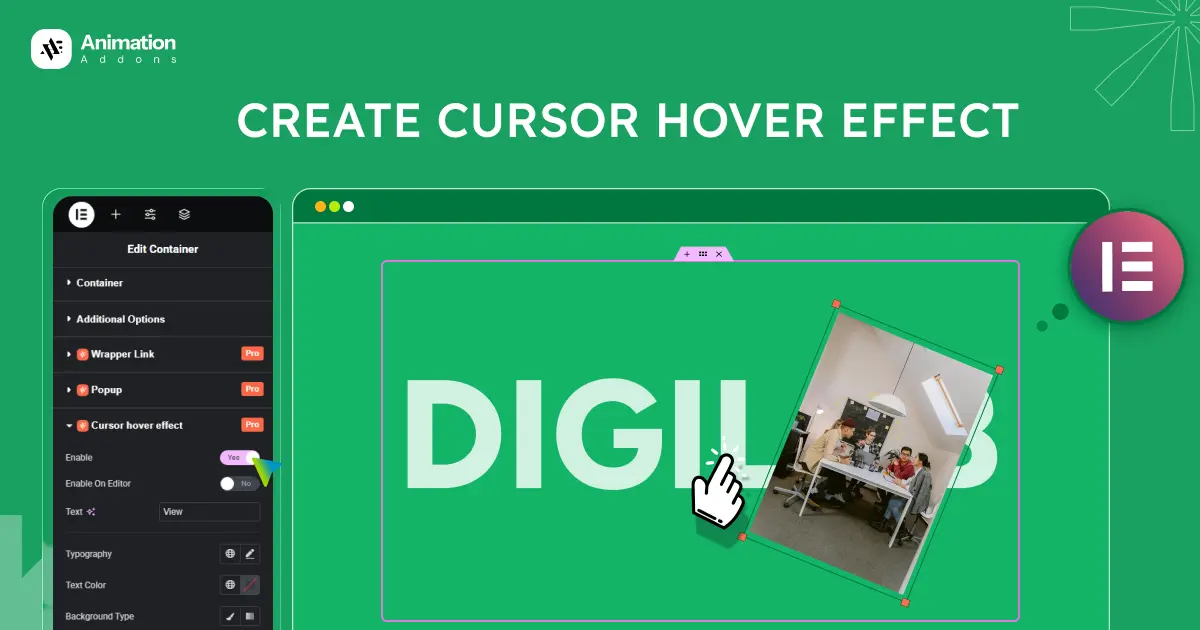
Hover-Triggered Motion
Hover animations start when a user moves their mouse over a heading. Small movements like changing position, color, or size can make your site feel interactive. Hover effects work well for menus, call-to-action headings, or sections where you want users to interact.
Keep the movements smooth and simple to keep a professional look.
Scroll-Based Effects
Scroll animations make headings move as users scroll down the page. It can be simple, like fading in, or more advanced, like moving, rotating, or changing size. Like, ScrollTrigger animations are great for telling a story and guiding users through your content.
They make your page more lively and interesting. With tools like Elementor or Animation Addons, you can set these animations to happen at the right time while scrolling.
Step-by-Step: How to Animate Headings in WordPress
We’ll look at two simple ways to animate headings on your site. Such as:
- Animation Addons Or Elementor (WordPress Plugin).
- CSS (Coding method).
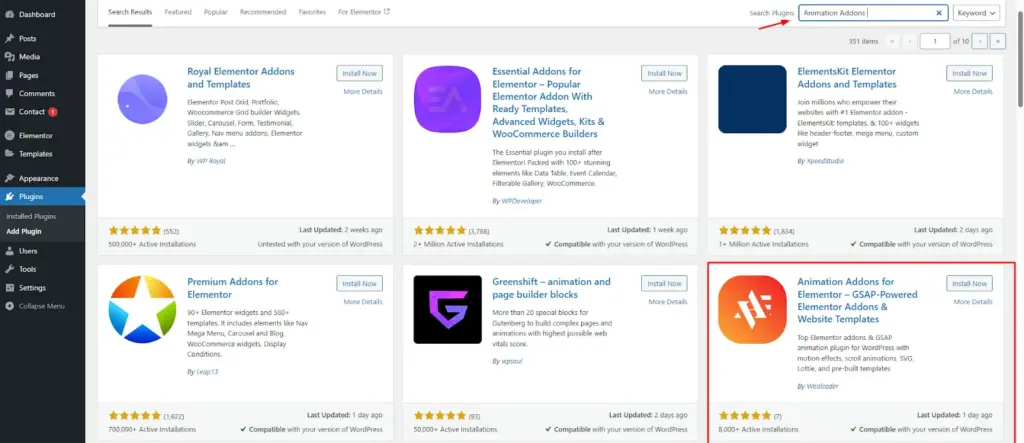
1. Animation Addons (WordPress Plugin)
In Animation Addons, you can animate headings in four ways using the widget, extension, 200+ Pre-built Websites, and the custom animation builder. We’ll go through each method one by one. Let’s start with the widget.
What You’ll Need Before You Start
- WordPress site with Elementor installed.
- Active Animation Addons or an Elementor-compatible theme.
- Animation Addons plugin installed and activated.
Creating Animated Headings Using Widgets
With this widget, creating animated headings is straightforward and enjoyable. Anyone can make their site feel more engaging effortlessly.
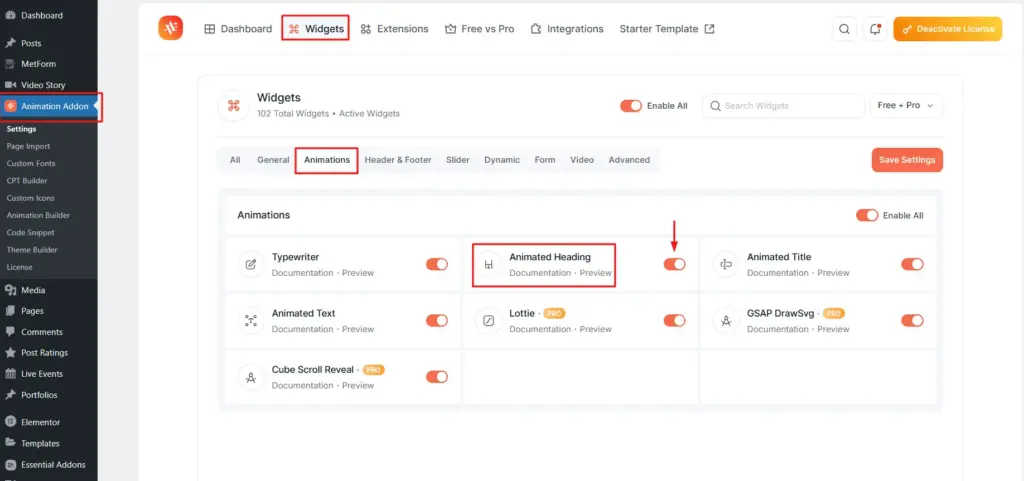
Step 1: Go to your WordPress Dashboard → Animation Addons → Widgets Tab → Under Animations, toggle on Animated Heading.
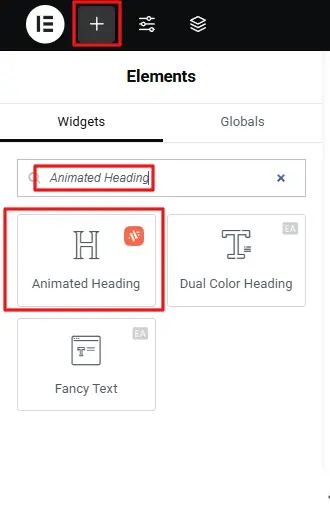
Step 2: Now, open the Elementor editor and click the ‘+’ icon. Type ‘Animated Heading’ into the search box. After it appears, click on it or drag it to the area where you want to place it.
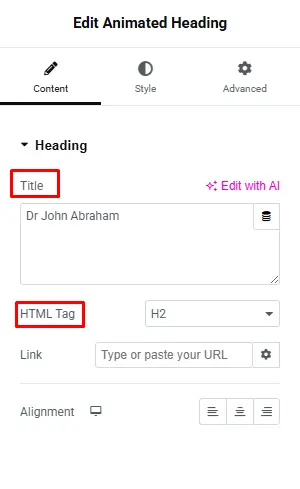
Step 3: Once you click Animate Heading, all the functions will appear. Then personalize each function according to your choice.
- Title: In the title section, enter the heading text you want to display. For example, here we used ‘We Believe in Quality Design, Not Quantity.’
- HTML Tag: Choose your heading tag in h1 to h6. Here H2 is selected.
- Link: You can add any type of link to make the heading clickable. In this example, no link is added. If you want, you can insert any link of your choice.
- Alignment: It controls the positioning of your animated heading within its container or section. For example, here ‘Center’ is selected, but you can pick any option according to your choice.
Final output
Creating Animated Headings Using Extensions
You have already explored one method in Animation Addons using widgets. Now, let’s move to the second method available through an extension called Text Animation.
Step 1: First, go to your WordPress Dashboard → Animation Addons → Extension Tab → Under ScrollSmoother, toggle on Text Animation.

Step 2: Next, open the Elementor editor and select the heading element you want to animate. Once selected, the ‘Text Animation’ extension will appear in the left panel. Click on it to access all available animation options.
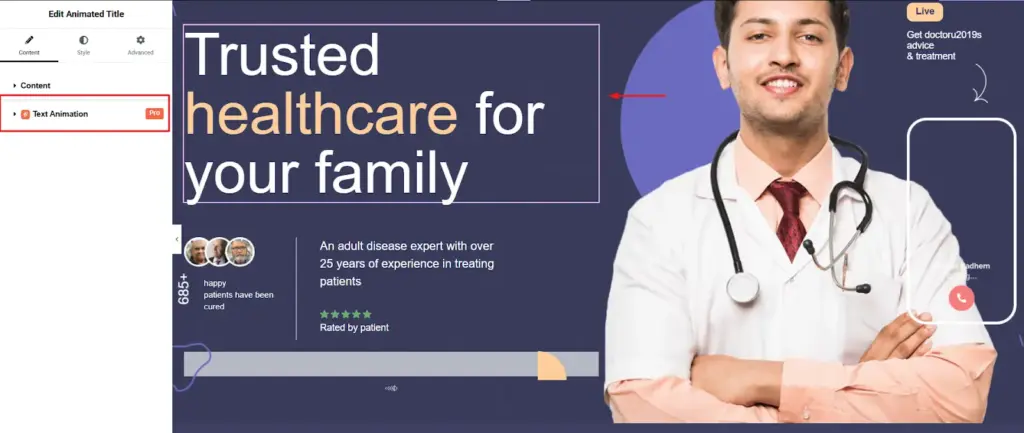
Step 3: Right after clicking, the first option you will see is ‘Animation’.
Animation
In animation, you will have many animation effects to choose from, such as Character, Word, Text Move, Text Reveal, Text Scale, Text Invert, and 3D Spin.
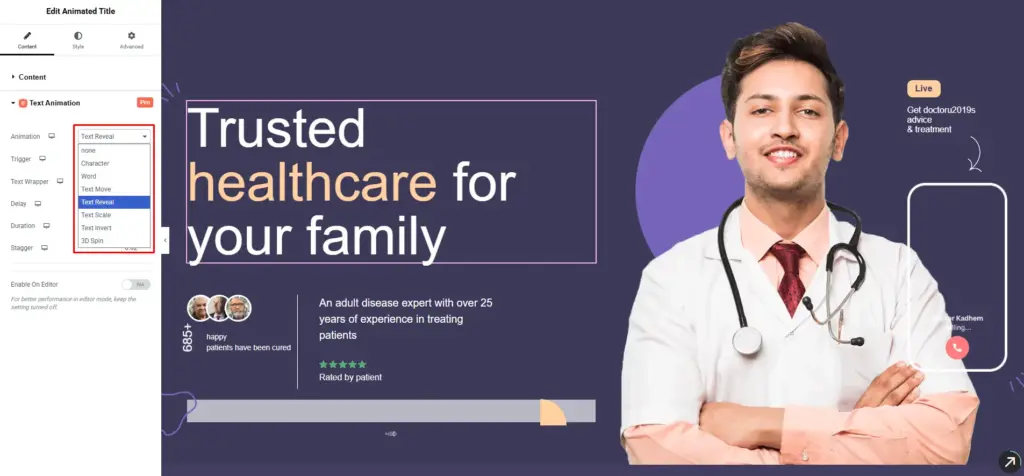
Let’s take a glance at what each animation does:
Character: It animates each character (letter) of your text separately.
Word: It will animates each word in your text individually.
Text Move: Applies movement-based animations (like slide, fade, or shift) to the whole text or its parts.
Text Revel: Creates a masking or uncovering effect. Your text appears as if it is being revealed from behind a shape or line.
Text Scale: Animates the size of your text. It scales up or down smoothly.
Text Invert: Applies a color inversion or flip-like effect, where text switches between colors (like light to dark).
3D Spin: Adds a 3D rotation effect. The text spins or flips in 3D space.
However, in this example, Text Reveal is selected.
Trigger
The Trigger option allows you to specify when the heading animation should start. Available options include:
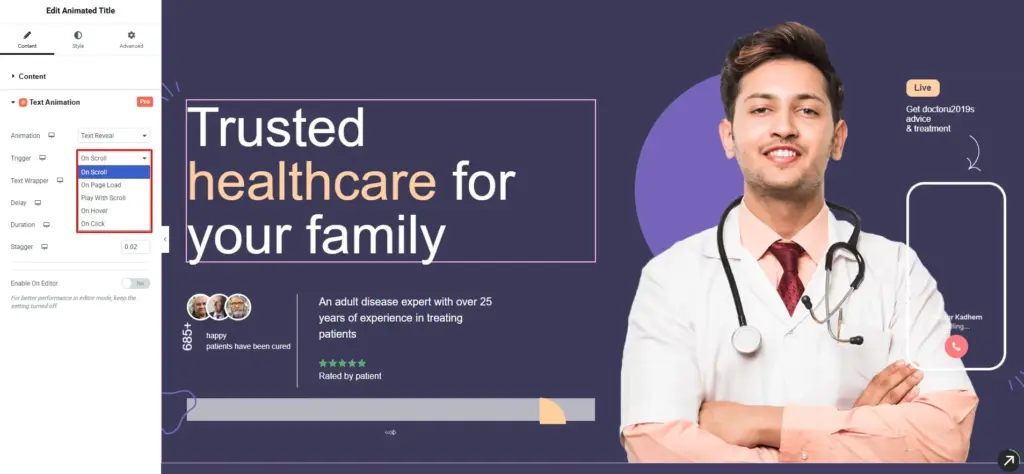
On Scroll: Its animation starts when the text comes into view as you scroll down the page
On Page Load: The animation plays automatically as soon as the page loads — no scrolling or clicking needed.
Play with Scroll: The animation is linked to the scroll progress. This means as you scroll, the animation plays gradually.
On Hover: The animation triggers when a user hovers the mouse over the text element.
On Click: The animation starts when a user clicks on the text.
In this example, On Scroll has been selected.
Text Wrapper
Next, the Text Wrapper option is set to ‘Default’ automatically handles text wrapping for animation. On the other hand, choosing ‘Custom’ gives you full control to define the wrapping manually.
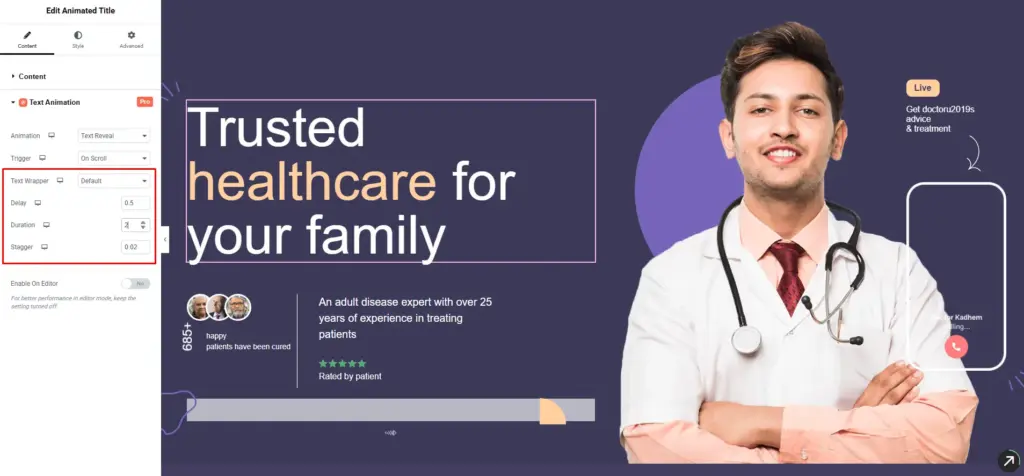
Choose ‘Default’.
Delay: Delay option controls how long to wait before the animation starts. In this example, the delay is set to 0.5 seconds.
Duration: Use the Duration setting to control the total time the animation takes to complete. Here, the duration is set to 2 seconds.
Stagger: Stagger adds a short delay between the animation of each element. Set the value to 0.02 seconds or adjust it based on your preference.
After adjusting all the values, the final output will look like this:
Starter Template 200+ Pre-Built Website
This is the simplest method to build an animated website in WordPress. No coding, development experience, or special skills are required. All you need to do is:
- Install and activate Animation Addons.
- After that, go to ‘Animation Addons’ and choose ‘Starter Template’.
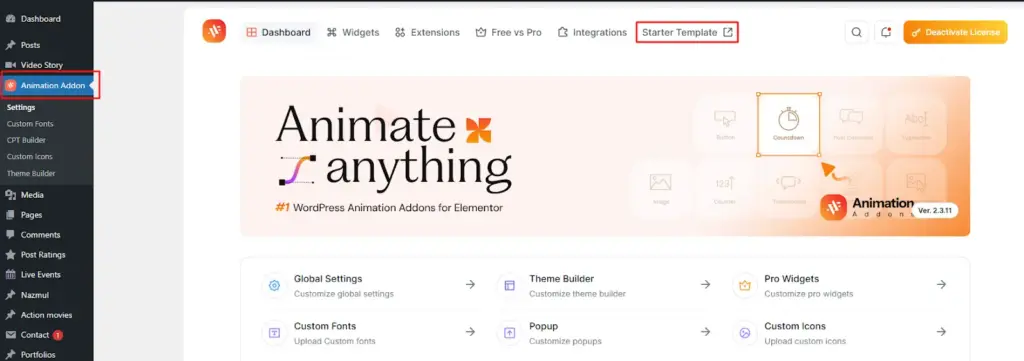
- Click on the ‘Starter Template’ to access 200+ ready-made websites. Each site comes with animations for your niche, so you don’t need to create them separately.
You will also find categories, a search bar, and filters to quickly locate your niche. Hover over any template to access the ‘Preview’ and ‘Import’ options. Click ‘Preview’ to view the template, and if you like it, click ‘Import’ to use it.
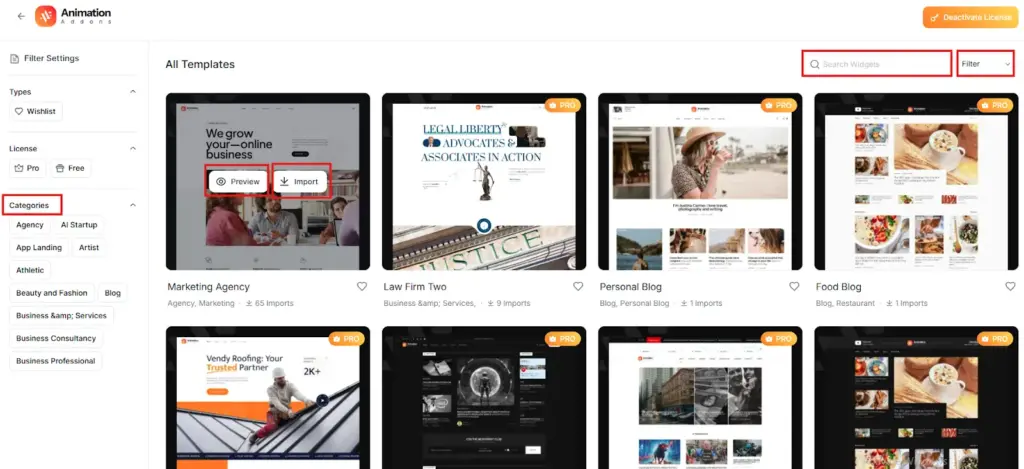
Here is an example below:
Create Animated Headings with Custom Animation Builder
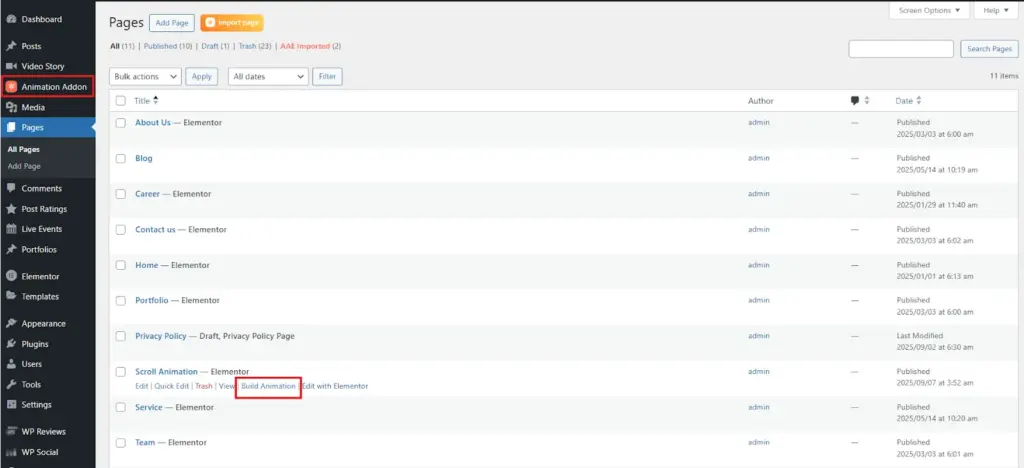
You have seen three methods so far for animating headings using Animation Addons. Now, we will look at how to animate a heading with the Custom Animation Builder, which works as a full builder itself.
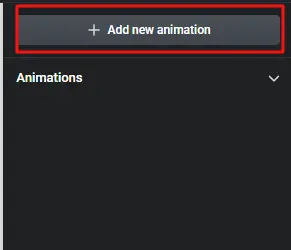
Step 1: Head over to your pages and click “Build Animation.” Just make sure you’ve installed Animation Addons first.
Step 2: Next, click on ‘Add New Animation’ button.
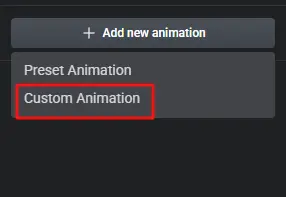
You will find two choices: Preset Animation and Custom Animation. Use Preset Animation for a fast setup without adjusting any settings. Select Custom Animation if you want to design your own style with full control. For this example, we’ll go with Custom Animation.
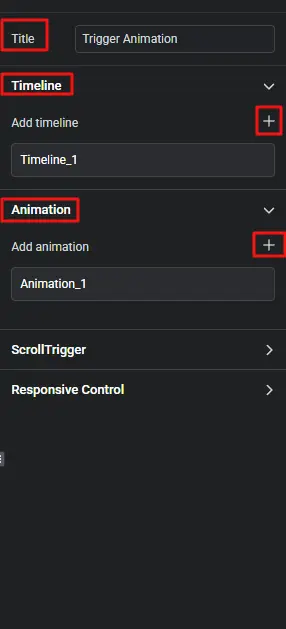
Step 3: Start by typing a title you want. Here, the title is Trigger Animation. Then click the ‘+’ icon to create a timeline and add your animation just like before.
Step 4: Select the heading text element you want to animate.
Then, click on ‘Animation_1’ to open the animation settings. Add the timeline you created.
Since we made ‘timeline_1’, we’ll add it to the property box. Next, you’ll see the method options: To, From, and Set. Choose the one that matches your style.
For example, we chose ‘From’ here.
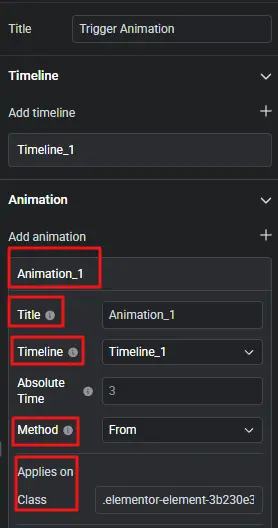
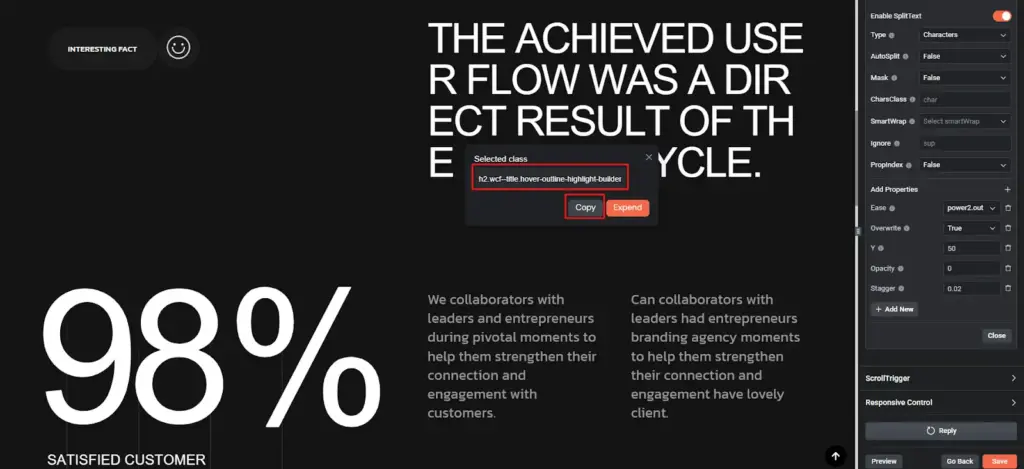
Go to the element you want to animate and click the left button on your mouse. A box with the class name will pop up. Copy the class name and paste it into the Class box.
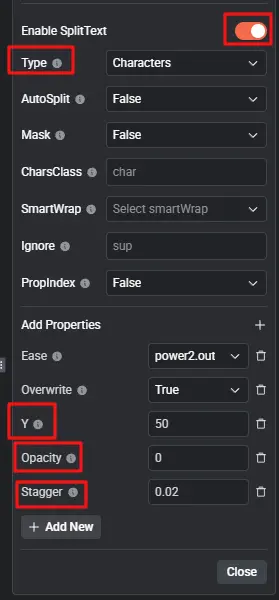
Step 5: Now enable SplitText. Next, under Type, select Character from the options, such as Lines and Words.
Then, click Add New. Add effects such as Y, Opacity, and Stagger, and set their values like this:
- Y: 50
- Opacity: 0
- Stagger: 0.2
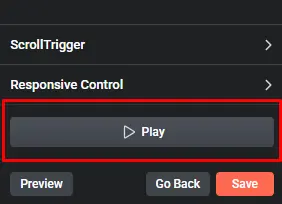
Step 6: Finally, hit the “Save” button, then click “Play” to preview the animation.
Animated Heading Via Elementor
Till now, you have seen how you can animate headings with animation addons. Now, let’s focus on Elementor.
Let’s walk through the process of adding animation to a heading in Elementor.
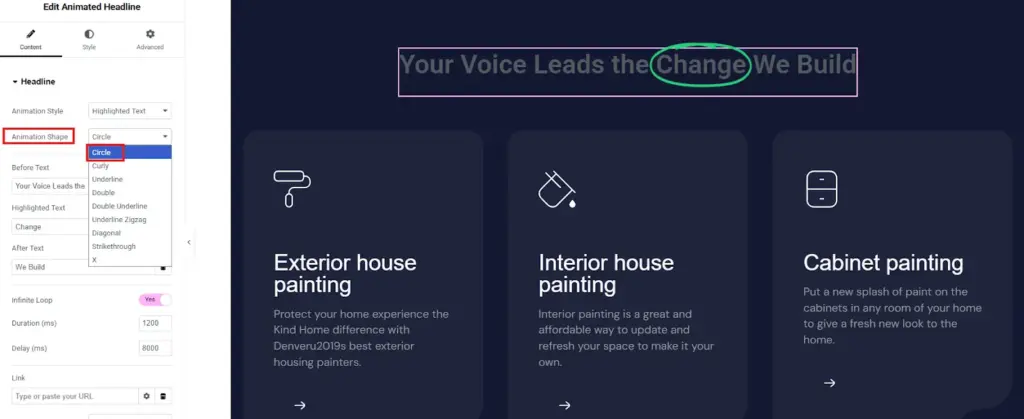
Step 1: Go to the Content tab, open the Headline section, and select Highlighted or Rotating from the Style field.
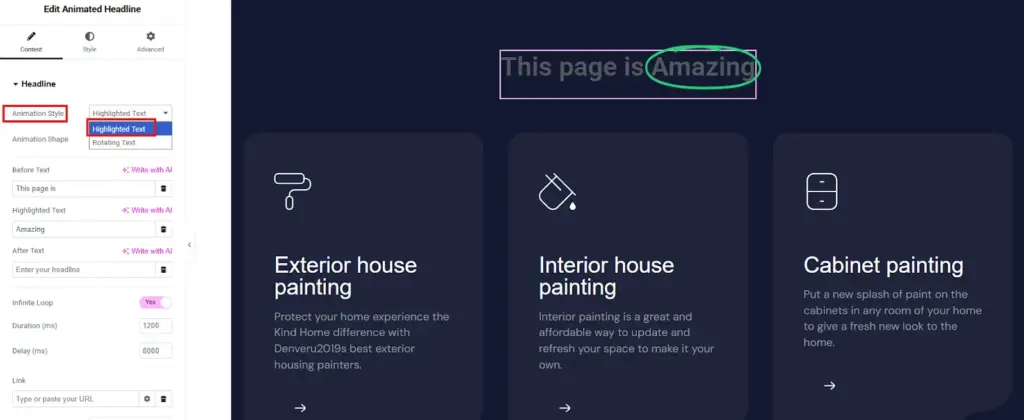
Step 2: Selecting the highlighted style unlocks additional customization options.
- In the Shape field, select the highlight shape you prefer, such as Circle, Curly, Underline, Double, Double Underline, Underline Zigzag, Diagonal, Strikethrough, or X.
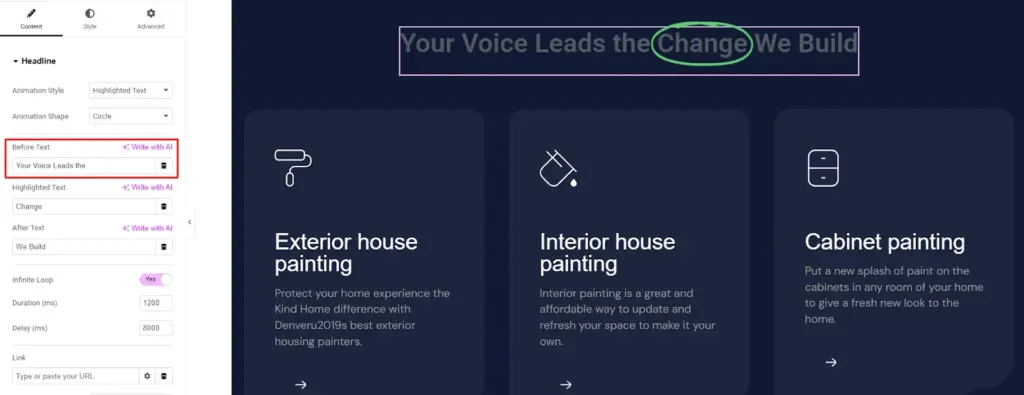
- In the Before Text field, enter the headline that you want to display before the highlighted portion.
- In the Highlighted Text field, enter the text you want to highlight.
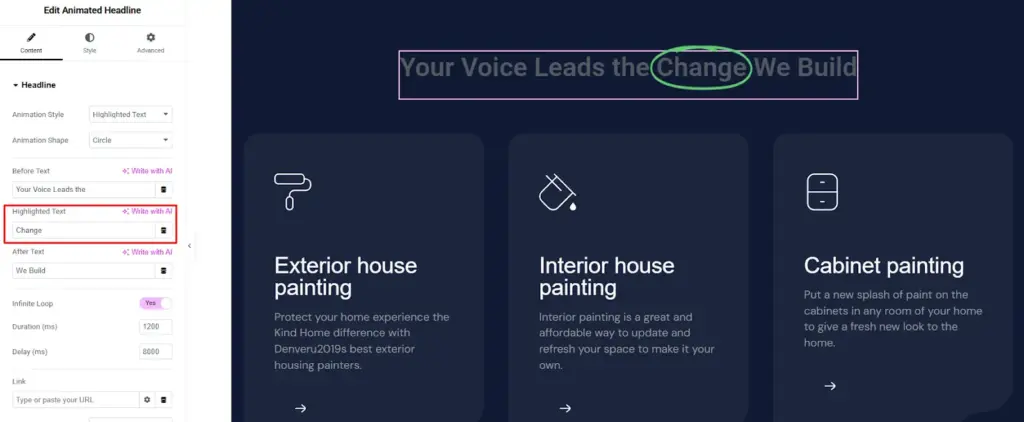
- In the After Text field, enter the headline that will be displayed following the highlighted text.
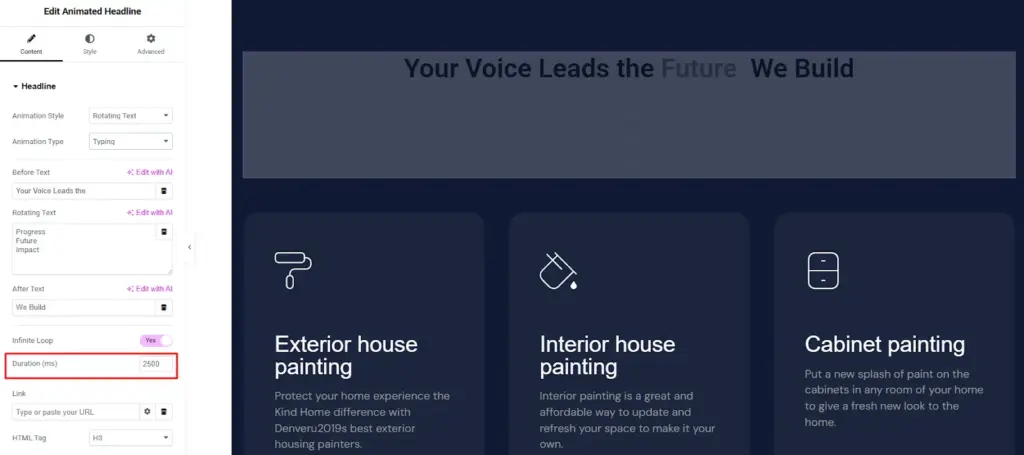
Step 3: If the rotating style is selected, the following customization options become available:
- In the Animation field, select the rotation animation for the text, such as Typing, Clip, Flip, Swirl, Blinds, Drop-in, Wave, Slide, or Slide Down.
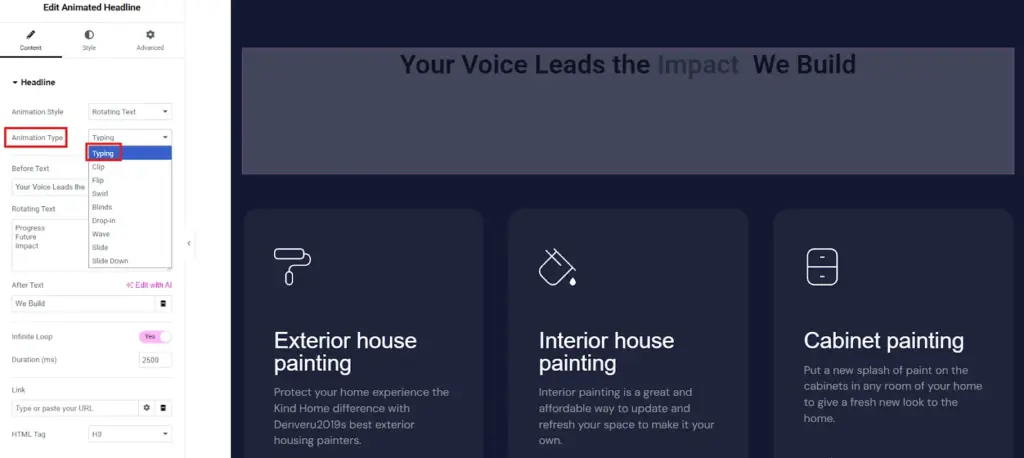
- In the Before Text field, type the headline that will show up before the rotating text.
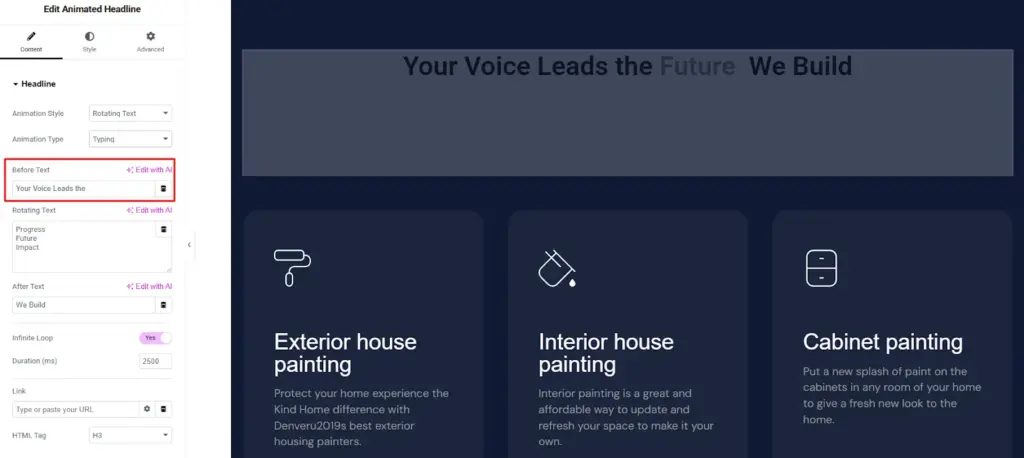
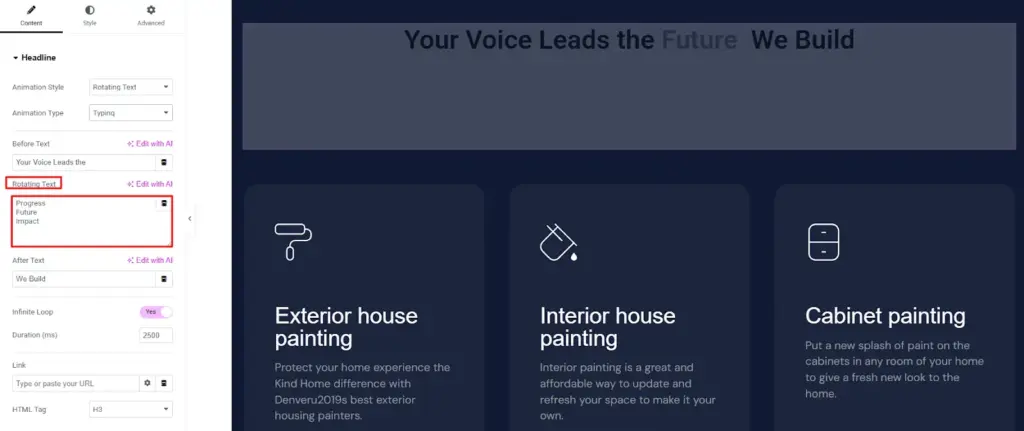
- In the Rotating Text field, enter the texts to rotate, arranged in the desired rotation order.
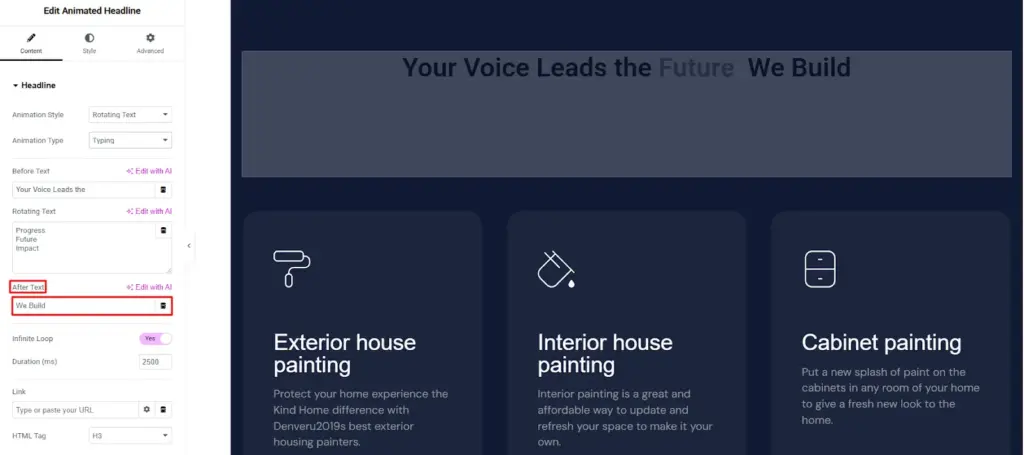
- In the After Text field, enter the headline that will appear following the rotating text.
Step 4: Set the Infinite Loop field to Yes for the animation to repeat continuously, or select No to play it just once and stop at the final frame.
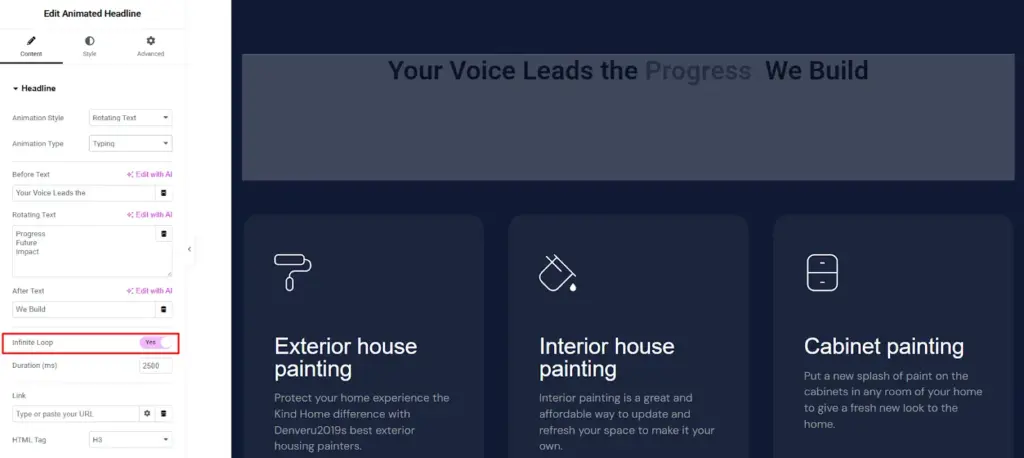
Step 5: In the Duration field, specify the time in milliseconds for one complete animation loop.
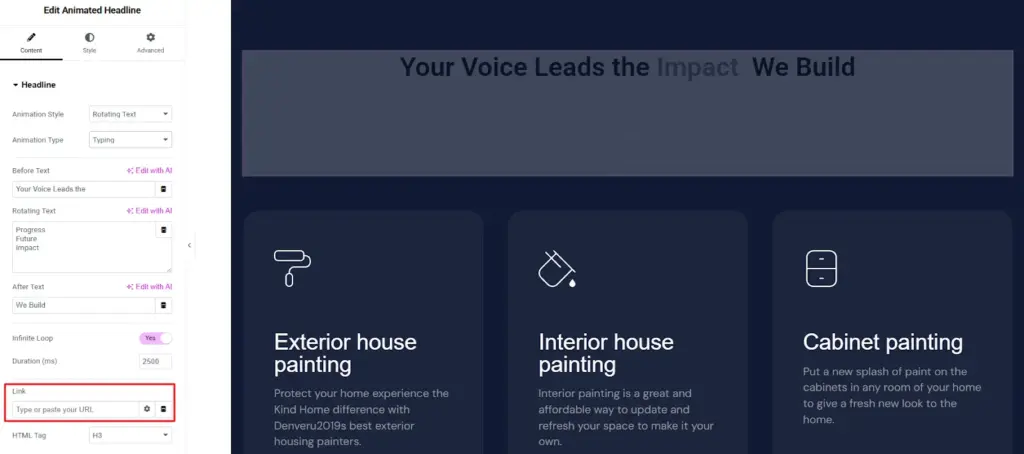
Step 6: In the Link field, type the URL to make your headline clickable, and click the icon to access additional link settings.
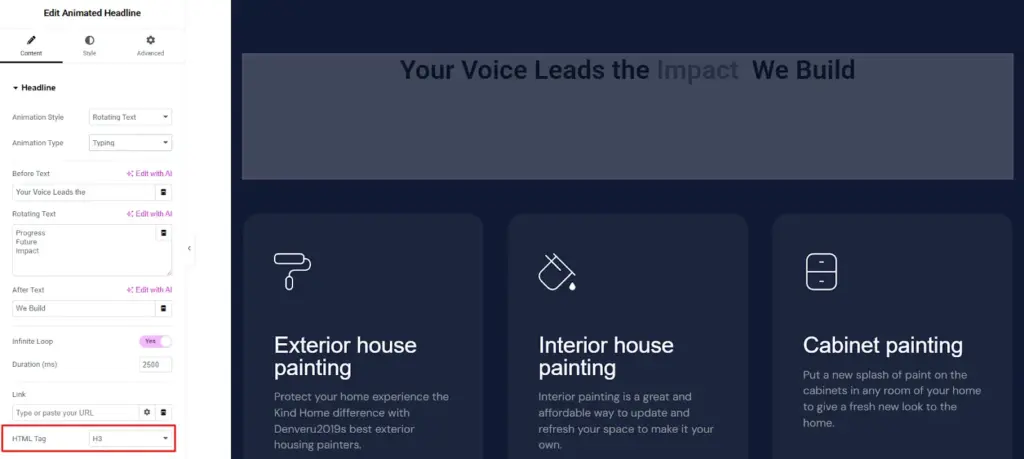
Step 7: Use the HTML Tag field to select the HTML tag for your heading, with options including H1 to H6, Div, Span, or Paragraph.
2. CSS (Coding Method)
Here’s a simple and complete example of how to animate headings in WordPress using pure CSS, no plugins required.
- Go to Appearance → Customize → Additional CSS.
- Paste your chosen CSS code snippet.
- Edit your heading widget or HTML block and add the matching class name (like fade-in-heading).
- Save and preview your page.
1. Fade-In Heading Animation
					/* Add this CSS to your WordPress Customizer or style.css */Add this CSS to your WordPress Customizer or style.css */

.fade-in-heading {

  opacity: 0;

  animation: fadeIn 1.5s ease-in forwards;

}

@keyframes fadeIn {

  from {

    opacity: 0;

  }

  to {

    opacity: 1;

  }

}
How to use it in HTML:
<h2 class="fade-in-heading">This Heading Fades In Smoothly</h2>
This creates a clean fade effect where your heading gently appears on load — great for hero sections or landing page titles.
2. Slide-Up Heading Animation
					.slide-up-heading {

  opacity: 0;

  transform: translateY(30px);

  animation: slideUp 1s ease-out forwards;

}

@keyframes slideUp {

  0% {

    opacity: 0;

    transform: translateY(30px);

  }

  100% {

    opacity: 1;

    transform: translateY(0);

  }

}
How to use it in HTML:
<h2 class="slide-up-heading">This Heading Slides Up on Load</h2>
This makes your heading move upward slightly as it appears perfect for modern, minimal designs.
3. Rotate-In Heading Animation
					.rotate-heading {

  opacity: 0;

  transform: rotateX(-90deg);

  animation: rotateIn 1s ease-out forwards;

}

@keyframes rotateIn {

  from {

    opacity: 0;

    transform: rotateX(-90deg);

  }

  to {

    opacity: 1;

    transform: rotateX(0deg);

  }

}
How to use it in HTML:
<h2 class="rotate-heading">This Heading Rotates Into View</h2>
This animation adds a subtle 3D like rotation as the heading becomes visible. It is eye-catching and professional.
Common Mistakes to Avoid
Animations can make your headings look appealing. But if used the wrong way, it can make your website hard to use. It can also slow it down and make it harder to find on Google.
Here are some mistakes to avoid:
Using too many animations on one page
Adding lots of different animation types can confuse visitors and make your page look messy. Stick to a few simple effects that match your website’s style. For example, if one heading fades in, use similar gentle effects for other headings instead of mixing bounce, flip, and zoom all at once.
Ignoring page speed
Big or many animations can make your site slow, especially on phones. Slow pages frustrate visitors and make them leave. Always test your animations on different devices and avoid effects that are too heavy for the browser.
Not thinking about Google’s Core Web Vitals
Google checks how fast and smooth your site is. Bad animations can make pages load more slowly or jump around, which hurts SEO. Make sure your animations are smooth, light, and don’t move the page layout unexpectedly.
Forgetting about accessibility
Animations that move too fast or blink too much can be hard to see for some people. Give users an option to reduce motion and avoid animations that can make them uncomfortable.
Wrap Up
Animating your headings makes your website look modern and attractive. You can do it easily with Animation Addons or Elementor. If you know coding, you can also use CSS.
A simple fade, slide, or reveal effect can grab attention fast. It helps people follow your content easily. Keep your animations smooth and simple for the best look. Don’t use too many effects on one page. Check your site speed after adding motion. Make sure every animation looks natural and matches your design.
Now you can make any heading stand out in seconds. Try Animation Addons to add motion and make your website come alive.
FAQs
Can I animate multiple headings on one page?
Yes, you can animate many headings on one page without any problem. Just make sure the animations look similar so the page feels neat and connected. Using too many different effects can make the page look messy and uneven.
A consistent motion style, such as fade or slide, helps maintain harmony across your design and keeps the user’s attention on your message rather than the movement itself.
Will animations slow down my site?
Smooth, optimized animations have very little impact on your site’s loading speed or performance. Lightweight CSS or GSAP-based effects usually run efficiently on modern browsers. Problems tend to appear only if there are too many animated elements or heavy files involved.
To keep your website fast, choose simple effects that use transform and opacity properties, which are easier for browsers to process. Regularly test your page speed after adding animations to ensure it continues to perform well on both desktop and mobile.
Can I combine plugins and CSS animations?
Yes, it is possible to combine both approaches to achieve more creative results. Many designers prefer using plugins for entry or scroll-based motion and CSS for hover or color transitions. This method gives greater control over how elements move and respond.
Careful testing is essential to avoid conflicts between the two systems, as overlapping effects can cause flickering or unexpected results. Always preview your work on the live page to confirm that every animation runs smoothly and complements the overall design.
Leave a Reply