Think about a website where everything shows up at the same time like text, images, buttons, all fighting for your attention. It feels overwhelming, a bit messy, and easy to scroll past.
Now think about a site where things appear slowly, one after another, as you move down the page. It feels calmer. Easier. More enjoyable. That’s exactly what a fade animation does. Fade animations don’t shout for attention. They work quietly in the background, helping guide the viewer’s eyes and keeping the page easy to follow. With a simple change in opacity, your content feels smoother, more intentional, and more comfortable to read.
In this guide, you’ll learn the easiest way to create fade animations in Elementor and make your page feel smooth instead of static.
What is Fade Animation?
A fade animation is a visual effect where an element gradually appears or disappears instead of showing instantly. It works by smoothly changing the element’s opacity, which makes the transition feel natural and easy on the eyes.
There are some common types of fade animation, such as:
- Fade In: The element starts invisible and slowly becomes visible
- Fade Out: The element slowly disappears
- Fade Toggle (In & Out): An element fades in and fades out using the same trigger, such as a click or hover.
- Cross-Fade: One element fades out while another fades in at the same time, creating a smooth transition between them.
Fade animations are commonly used on websites to reveal text animation, image animation, interactive button animation, or sections as users scroll or when a page loads. They help guide attention, improve readability, and make pages feel smoother and more professional without being distracting.
How to Create Fade Animation in Elementor: Step-by-Step Guide
You can create fade animations using many tools, but in this tutorial, we will use Animation Addons because it’s a no-coding solution that lets you build advanced animations quickly inside Elementor.
With Animation Addons, you can control how, when, and from where an element appears without writing any code. Let’s break it down, easy step-by-step process.
Step 1: Enable the Animation Option
To start, you need to enable the animation feature in Animation Addons. Log in to your WordPress Dashboard and open Animation Addons from the menu.
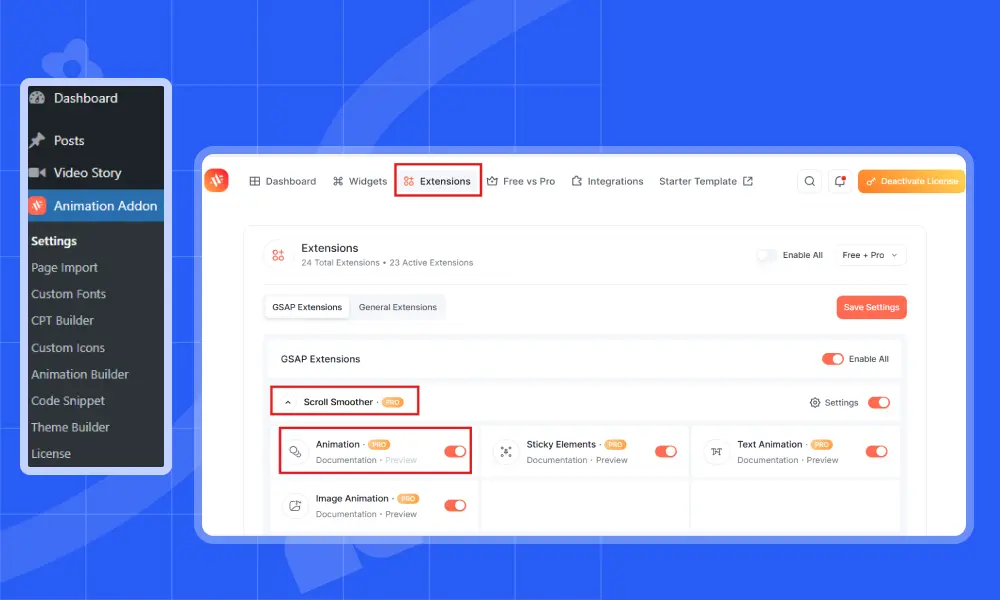
Navigate to the Extensions tab and locate the Scroll Smoother section. Under Scroll Smoother, find Animation and toggle it ON to instantly enable smooth scrolling effects on your website. Once this is enabled, you’ll be able to add fade animations to elements inside the Elementor editor.
Step 2: Open Your Page in Elementor
Next, open the page where you want to add the fade animation.
You can either:
- Create a new page
- Import a ready-made template, page, or section from Animation Addons, according to your specific needs.
Animation Addons gives you flexible import options, so you can start from scratch or work with pre-built layouts. Once your page or template is ready, click Edit with Elementor to open it in the Elementor editor.
Step 3: Enable the Fade Animation
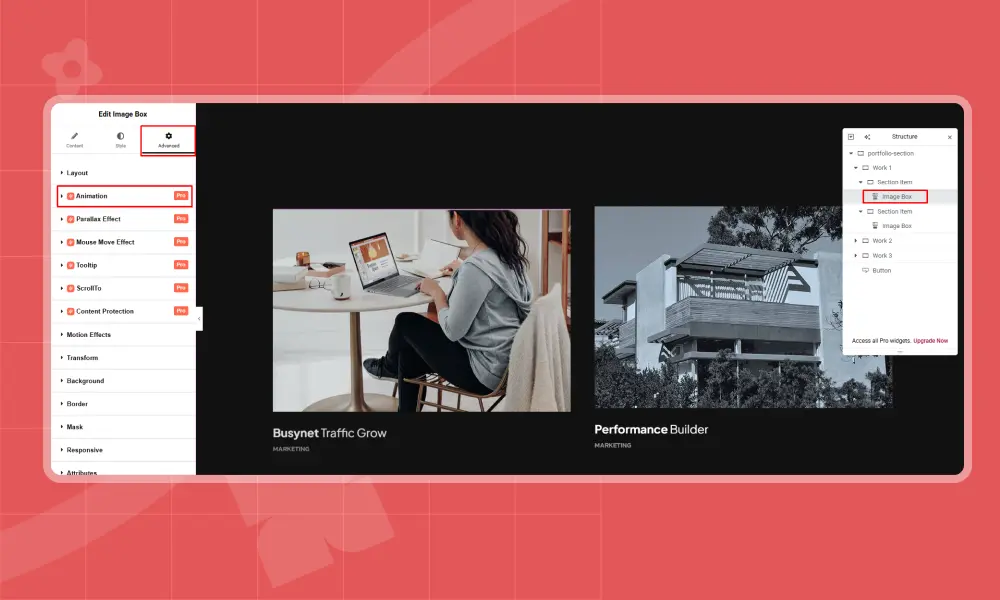
Scroll down to the Animation section and click to expand it. You’ll see several options, including None, 3D Animation, Fade Animation, and Custom.

From these options, select Fade Animation. Once selected, the fade animation settings will appear, allowing you to customize how the animation behaves.
Step 4: Customize the Fade Animation
After selecting Fade Animation, you’ll get access to customization options.
Method
The first option you’ll see is Method, which includes From and To.
- From means where the animation starts, the element comes from a hidden or offset position.
- To means where the animation ends, the element moves to its final, visible position.
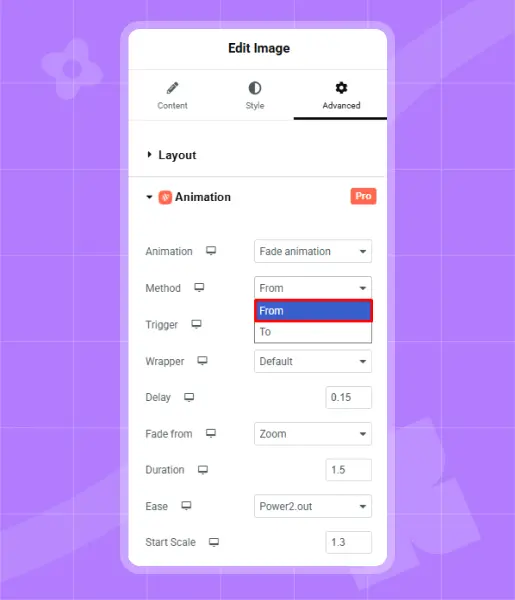
In simple terms, From defines where the animation begins, and To defines where it finishes.
Here, we’ve selected From as the method, which means the animation will start from a specific direction or position and move into view.
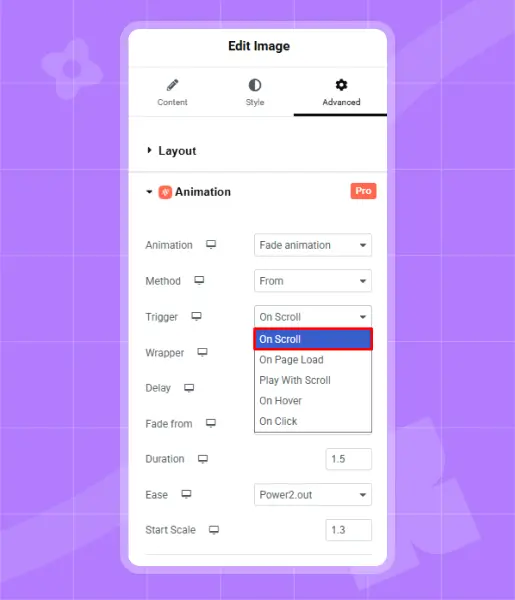
Trigger
Next, you need to choose a Trigger, which will decide when the animation will play.
- On Scroll – The animation plays when the element enters the viewport as you scroll down the page.
- On Page Load – The animation plays automatically when the page finishes loading.
- Play with Scroll – The animation is synced with scrolling, so the movement follows your scroll position.
- On Hover – The animation plays when someone hovers over the element.
- On Click – The animation plays when the element is clicked.
Here, we’re selecting ‘On Scroll’ so that the animation plays when the element enters the viewport as you scroll down the page.
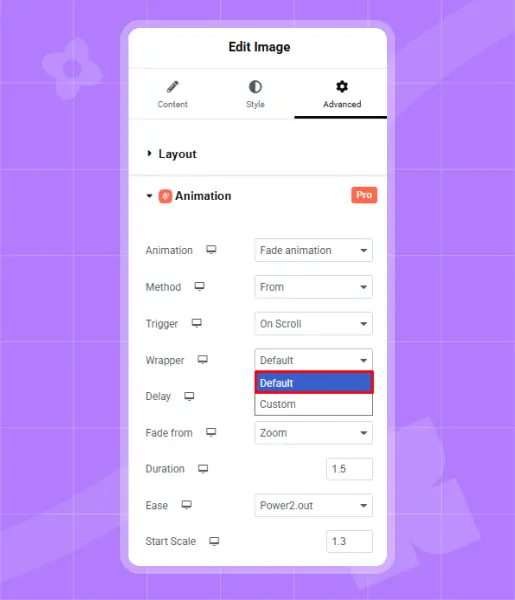
Wrapper
Wrapper defines where the animation starts and ends.
- Default – Uses the default wrapper settings automatically.
- Custom – Lets you choose a different wrapper and control the animation range manually.
If you select Default, the animation follows the standard behavior. If you choose Custom, you can fine-tune the start and end points of the animation.
Delay, Fade From and Duration
The delay controls how long the animation waits before starting after the element loads. For example, if I set the delay to 0.15 seconds, the animation will begin 0.15 seconds after the element appears.
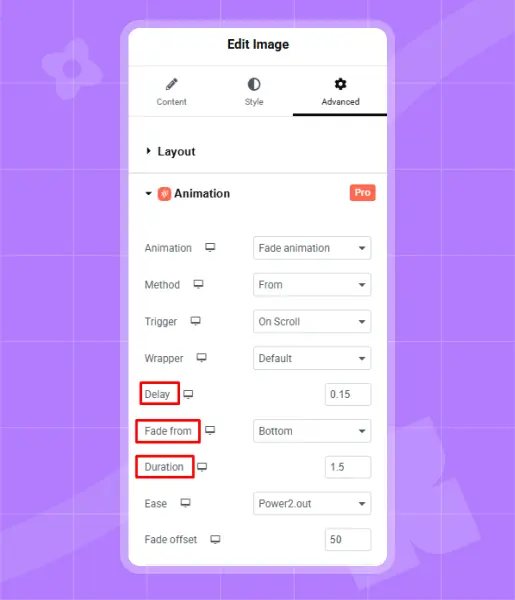
Fade From defines the direction from which the element starts to fade into view as you scroll. It helps create smooth entrances for headers, sections, images, or call-to-action blocks. You can choose from the options: top, bottom, left, right, in and zoom. In this example, we’ve selected Bottom, so the element smoothly fades in from the bottom of the page.
Duration controls how long the animation takes to finish once it starts. For example, if you set the duration to 1.5 seconds, the animation will complete in 1.5 seconds after it begins. You can adjust this value to make the animation feel faster or slower, depending on the desired effect.
Ease and Fade Offset
Ease controls how the animation moves and feels. It defines the speed and flow of the animation, making it smooth, playful, or dramatic.
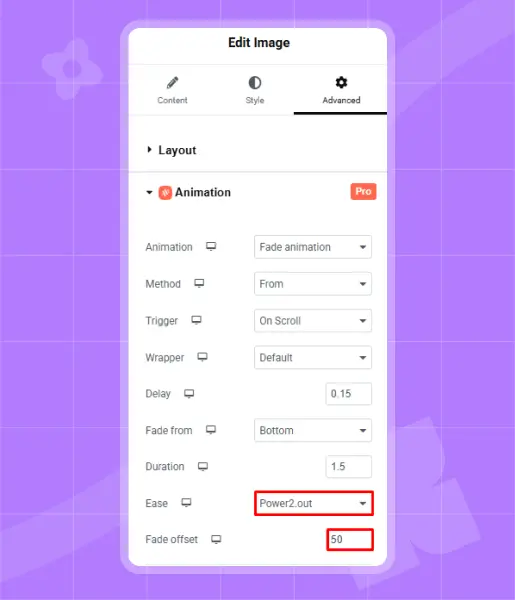
There are a lot of easing options: Power2.out, bounce, back, elastic, slowmo, stepped, sine and expo. Here we use power2.out. It creates a smooth, natural fade animation by starting quickly and easing gently at the end, making transitions feel polished and visually comfortable.
Fade Offset controls the angle and distance from which an element enters during a fade animation. It adds depth to the motion, making the animation feel more dynamic instead of flat. By adjusting the offset value, you can change the direction and intensity of the fade effect.
For example, if you set the Fade Offset to 50, the element will fade in from a 50-degree angle on the page.
Step 5: Preview the Fade Animation
Click the Preview icon to see the fade animation in action. Once satisfied, click Update to save changes.
Best Practices for Fade Animation
Responsive fade animations are a powerful way to enhance visual flow without overwhelming users, but they must be applied thoughtfully to remain effective. When used correctly, fade effects create smooth transitions, guide attention, and improve overall user experience across devices.
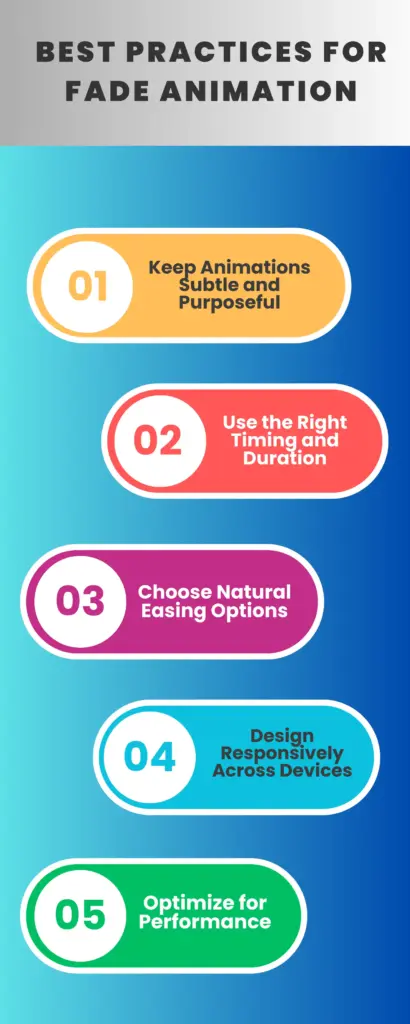
Keep Animations Subtle and Purposeful
Fade animations should support content, not distract from it. Use them to introduce sections, highlight key elements, or guide users through a page naturally. Overusing fades or applying them to every element can feel excessive and reduce clarity.
Use the Right Timing and Duration
The duration of a fade animation plays a critical role in how it feels. A range between 0.6 to 1.2 seconds usually feels smooth and controlled. Short durations may appear abrupt, while longer fades can make the site feel slow and unresponsive.
Choose Natural Easing Options
Easing defines how an animation starts and ends. Opt for natural easing functions such as power2.out to create gentle finishes that feel polished and comfortable to the eye. Avoid harsh or bouncy easing for fade effects, as they can break visual flow.
Design Responsively Across Devices
Fade animations should behave consistently for responsive text animation, responsive image animation on desktop, tablet, and mobile. Always test across screen sizes to ensure animations feel smooth and do not interfere with scrolling or content visibility on touch devices.
Optimize for Performance
Use lightweight animation solutions and avoid stacking multiple effects on the same element. Optimized fade animations improve visual quality while maintaining fast load times and strong Core Web Vitals, ensuring a professional and user-friendly experience.
Final Words
Fade animations are a simple yet powerful way to bring life to your Elementor website. When used thoughtfully, they help content appear smoothly, guide user attention, and make pages feel more polished and enjoyable to explore.
With Animation Addons, adding fade animations becomes easy and flexible, with no coding required. By adjusting options like trigger, direction, duration, easing, and offset, you can create animations that feel natural and perfectly match your design.
Use fade animations with balance and purpose, and you’ll turn static layouts into smooth, engaging experiences that visitors actually enjoy scrolling through.
FAQs
Do I need Elementor Pro to create fade animations?
No, fade animations can be created using Animation Addons with the free version of Elementor, making it a flexible option for most users
Will fade animations affect website performance?
When built with Animation Addons, fade animations are lightweight and optimized, ensuring smooth visuals without negatively impacting performance or Core Web Vitals.
Can I apply different fade animations for desktop and mobile?
Yes, Animation Addons allows responsive control, so you can customize fade directions, durations, and easing separately for desktop, tablet, and mobile devices.
Are fade animations compatible with smooth scrolling?
Absolutely. Fade animations work seamlessly with smooth scrolling features in Animation Addons, creating a fluid and polished user experience.
Can I control the speed and easing of fade animations?
Yes, you can easily adjust duration, delay, and easing options like power2.out to achieve natural, professional-looking fade transitions.

Leave a Reply