Do you have a WordPress website that looks simple? There is no animation or movement on your pages. You might think you need to rebuild the whole site or make a new one to improve it. But you do not have to.
You can animate your existing WordPress website without starting over. You do not need to use any code unless you want to.
There are a few easy ways to do this. You can use no-code tools, plugins, or page builders to add animation. If you know a bit of coding, you can use your own code too. I’ll show you all the options, so you can pick what works best for you.
Now, let’s get started and make your site more lively and modern.
Types of Animation Effects You Can Use
Before you start, it is good to know the types of animations you can add. Animations make your website more interesting. They also help visitors explore your site with more interest. Here are some popular ones:
- Scroll Animations – Items appear or move when someone scrolls down the page.
- Hover Effects – If a person moves their mouse over a button or picture, it changes or moves slightly.
- Text Animations – Words can slide, bounce, or fade in to grab attention.
- Section Reveals – Full sections can slide, zoom, or fade in as people scroll.
- Mouse-tracking Animations – Effects that follow the mouse pointer as it moves.
- Looping Background Effects – Moving backgrounds or floating shapes that keep playing over and over.
Animation makes your website more interesting. It helps people notice important parts. It also keeps visitors engaged without causing confusion.
Ways to Add Animation to Your Existing WordPress Site
There are lots of ways to make your site move and look better. Some are simple and fast. Others need a little more work, but give you more options.
To make it simple, we’ll look at two easy ways:
- No-code WordPress plugins (perfect for beginners).
- Custom code (for developers).
1. WordPress Plugins
The easiest way to animate a WordPress website is with plugins. They are made for people who do not know coding. Most WordPress animation plugins work well with most themes and page builders.
Let’s look at easy ways to add animation to your WordPress site.
Animation Addons
First, let’s start with Animation Addons, a simple yet powerful no-code plugin for WordPress.
It includes 25+ animation extensions, and a custom GSAP Animation Builder. Easily add scroll effects, flip animations, and more, even to existing designs. It’s the easiest way to build animated websites like a pro.
Moreover, Animation Addons includes two main tools:
- Animation Addons Extensions.
- Animation Addons Animation Builder.
You can use the Extensions or the Animation Builder to add cool effects without writing any code.
Let’s explore how you can animate your existing WordPress site using Animation Extensions and the Animation Builder.
Text Animation Extensions
Here’s a simple guide to animate your existing text using the Text Animation Extensions:
Step 1: First, make sure you have installed the Animation Addons plugin on your WordPress site.
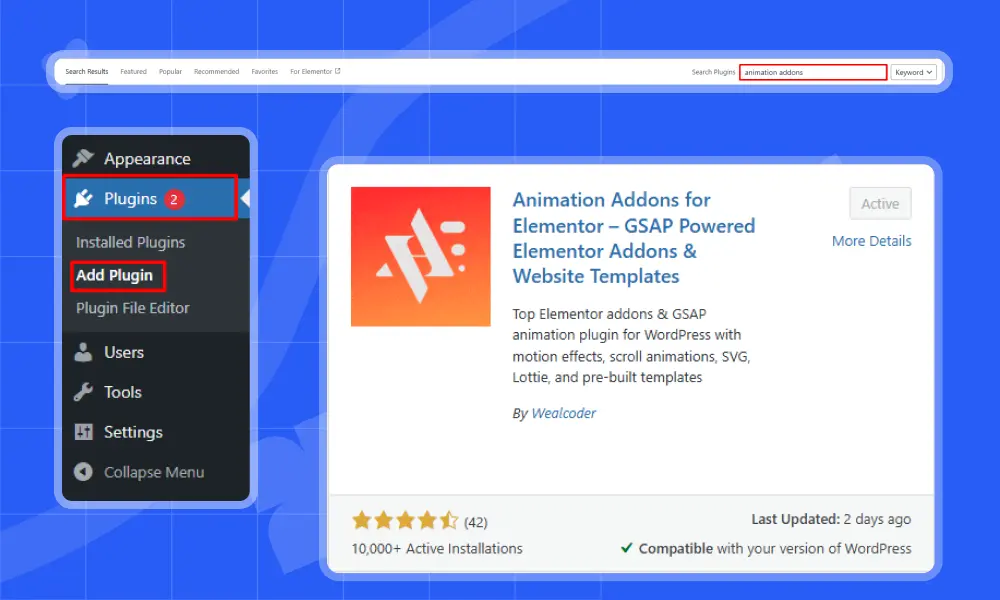
Step 2: Next, go to the Animation Addons plugin and click on Extensions. Choose any extension you want to use to add animation to your WordPress site.
For example, here it picks ‘Text Animation,’ but you can choose any extension you like.
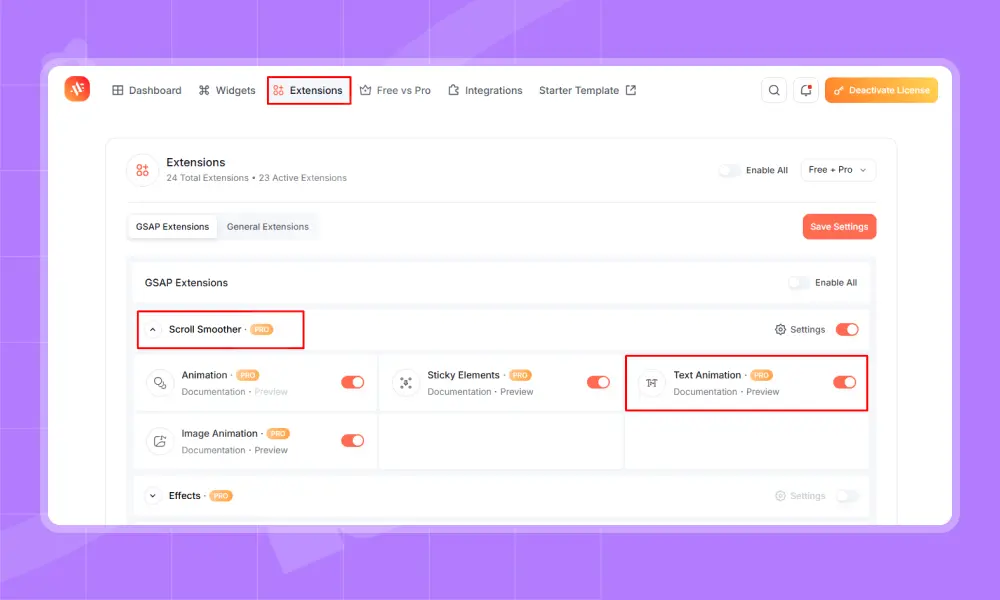
Step 3: Select a text element that you want to animate. Then, click on ‘Text Animation’.

Step 4: Text Animation offers different effects like Character, Word, Text Move, Text Reveal, Text Scale, Text Invert, and 3D Spin.
You can choose any effect based on what you need. For example, here it picks the ‘Character’ effect.
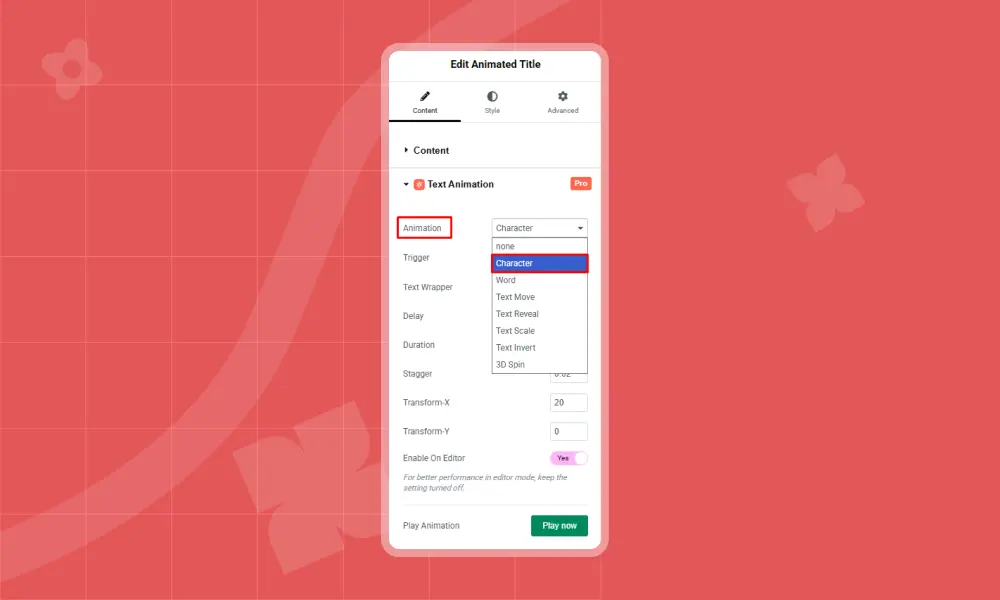
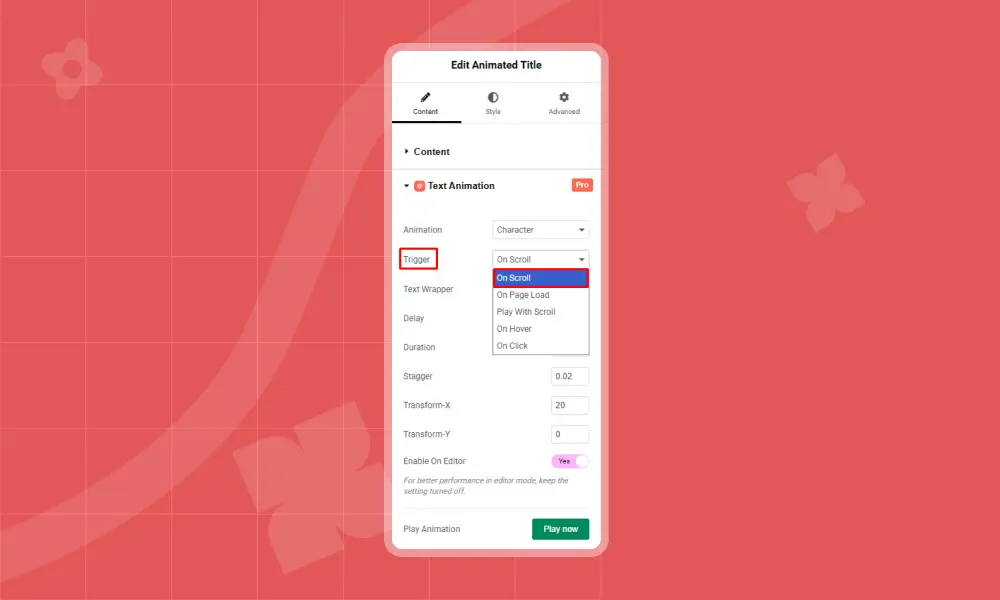
Step 5: Afterward, personalize the rest of the settings based on your choice. Here you will find options like Text Wrapper, Delay, Duration, Stagger, Transform X, Transform Y, Scrub, and Breakpoint to match your style.
Since I picked the ‘Character’ effect, the trigger is set to ‘On Scroll,’ but you can choose any option you like.
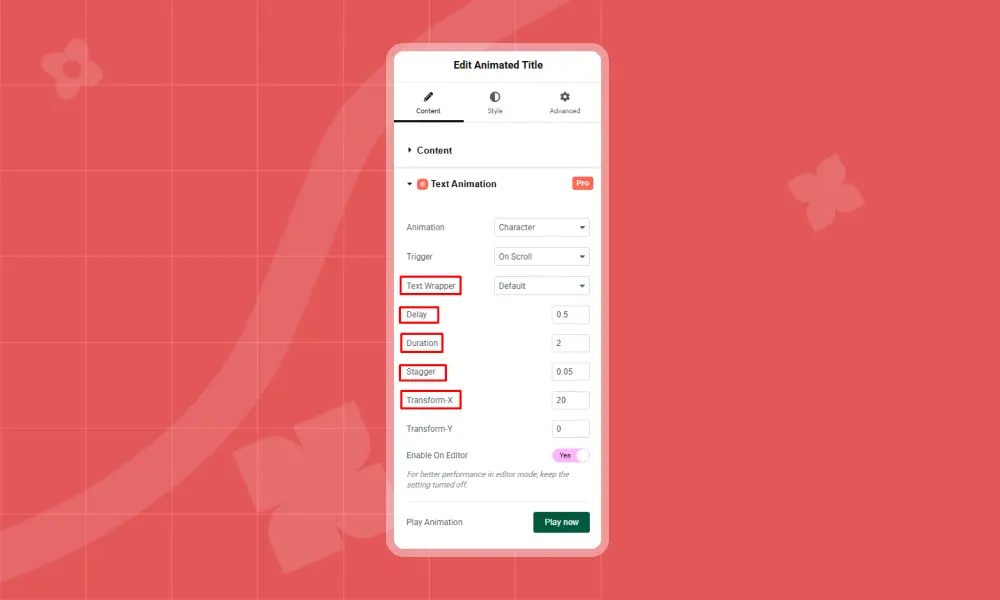
Then, set Text Wrapper to Default, Delay to 0.5, Duration to 2, Stagger to 0.05, and Transform X to 20, leaving other settings as they were.
Step 6: Finally, click ‘Publish’ and then click the ‘Preview’ button to see your Text Animation effect. You can also play the animation by clicking on ‘Enable on Editor’.
Using Animation Builder
So far, you have explored how to animate your existing WordPress site using the Animation Addons extension.
Now, for more control, try using the visual Animation Builder.
It lets you create custom animations. Set the time, start, delay, speed, and easing (how the animation moves). You can also choose what triggers the animation, like scrolling, hovering, or clicking.
Here’s a simple guide to designing your layout using Animation Builder:
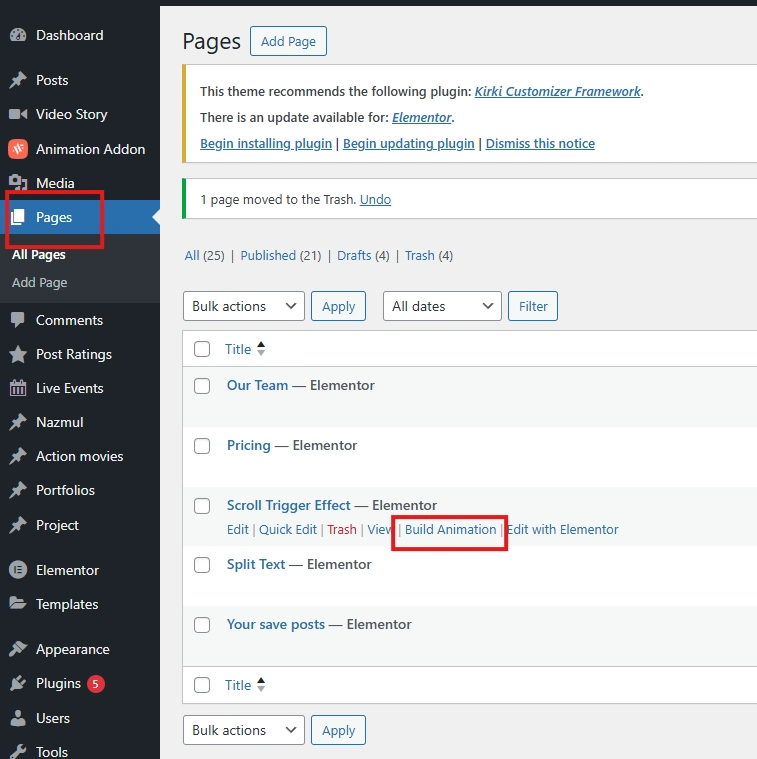
Step 1: Go to your pages and click ‘Build Animation (make sure Animation Addons is installed).
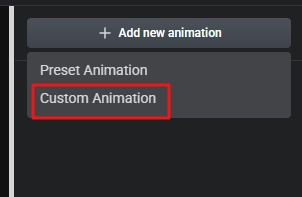
Step 2: After that, click on ‘Add New Animation’ button.
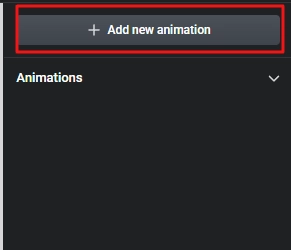
You’ll see two options: Preset Animation and Custom Animation. Choose Preset Animation if you want a quick result without changing any settings. Pick Custom Animation if you want full control to make your own style.
In this example, we’ll choose Custom Animation.
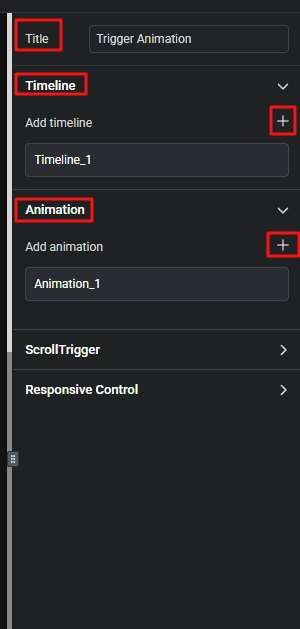
Step 3: Next, type a title you like. For example, here it’s set to Trigger Animation. Then, click the ‘+’ icon to add a timeline and animation the same way.
Step 4: Select any element, like an image or text, where you want to add animation.
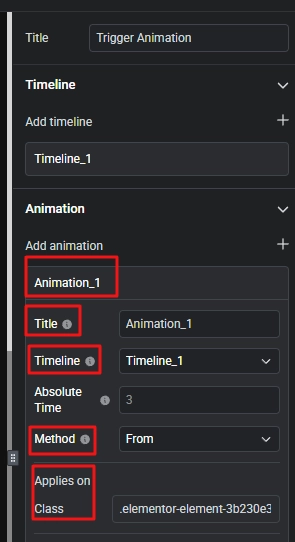
For example, we picked ‘Text’ here. Then, click on ‘Animation_1’ to open the animation settings. Add the timeline you created.
Since we made ‘timeline_1’, we’ll add it to the property box. Next, you’ll see the method options: To, From, and Set. Choose the one that matches your style.
For example, we chose ‘From’ here.
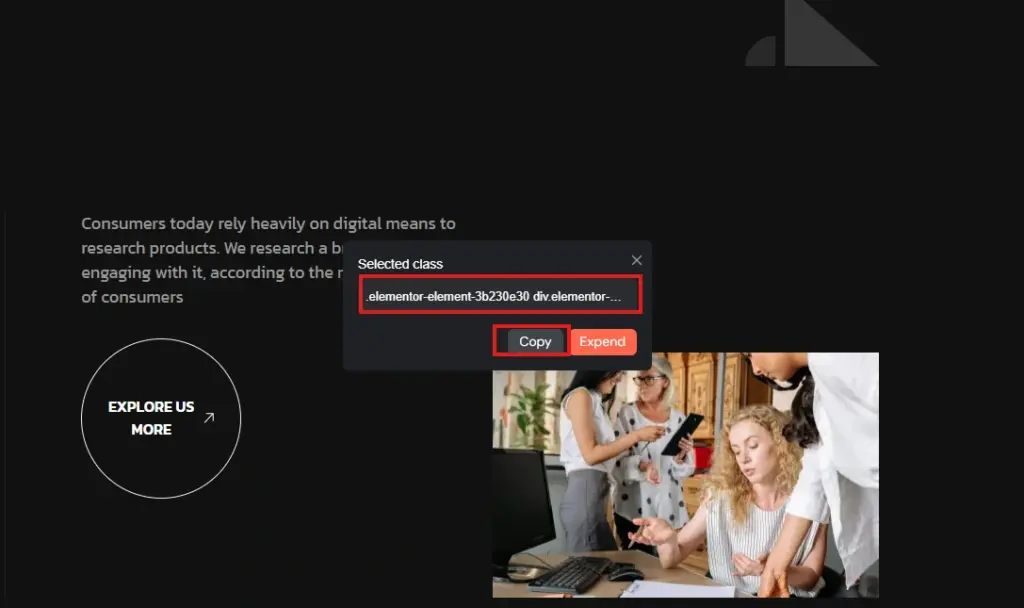
Go to the element you want to animate and click the left button on your mouse. A box with the class name will pop up. Copy the class name and paste it into the Class box.
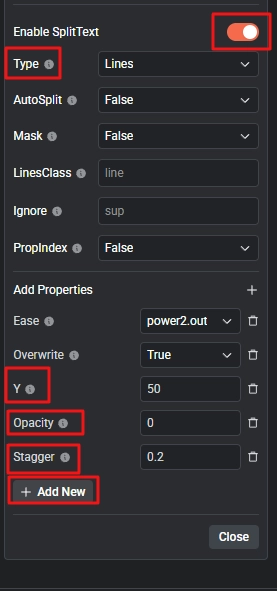
Step 5: Now, turn on SplitText. Then, choose the “Lines” option under Type. You can choose either Characters, Words, or Lines.
After that, click on the ‘Add New’ button. Then, add effects like Y, Opacity, and Stagger. Set their values to Y: -50, Opacity: 0, and Stagger: 0.2.
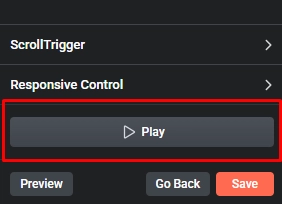
Step 6: Finally, hit the “Save” button, then click “Play” to preview the animation.
Use Animated Sections Template(Optional): If you want something even faster, you can import ready-made animated section templates. These are fully designed sections that already have animation added. Just change the text or images, and your section is ready. This is great for the homepage, landing pages, and hero areas.
Overall, it’s the best no-code animation tool for interactive web design in Elementor. Just pick, click, and watch it animate.
Elementor
Afterward, Elementor has built-in motion design for WordPress. These effects can make things move, like when you scroll or when you move your mouse. They can create simple animations, like fading in or having a moving background.
They are easy to use, but there aren’t too many choices. They are great for quick and light animations without needing an extra plugin or coding.
Slider Revolution
Slider Revolution is more than just a slider plugin. You can use it to make moving banners, pop-ups, and carousels. It features a drag-and-drop editor, allowing you to build by simply clicking and moving elements around.
You can set how it moves, when it shows, and what triggers it. It also comes with ready-made templates to help you build a page faster. It works well for homepage banners, product sliders, and other important parts of your site.
2. Custom Code (for Developers or Specific Needs)
If you know coding, use custom CSS for full control. It’s great for developers who want custom moves and timing.
Here are some helpful CSS animation tools you can use.
Animate.css
Animate.css is a free and easy library. It gives you many ready-made animations like fade, bounce, zoom, slide, and more. To use it, add the Animate.css file. Then apply class names in HTML or Elementor.
Example:
<div class = “animate_animated animate_fadeIn”></div>
This will make the element fade in when the page loads. Overall, it is best for simple animation on text, buttons, icons, or images.
Animista
Next, Animista is a website that helps you create custom CSS animations. You choose how things move, how long it takes, and when it starts. It shows you the live animation on screen. Then it gives you the exact code you need.
You do not need to write the code by yourself. You just copy and paste it into your website. Overall, it’s best for custom animation with full control over speed, style, and timing.
AOS (Animate On Scroll)
Last, we have AOS, which stands for Animate On Scroll. It’s a JavaScript-based library that adds animation as you scroll. It is easy to set up and include many animation types like fade, zoom, slide, and more.
It’s useful for showing content step by step while scrolling. You only need one line of code for each item you want to animate.
Example:
<div data-aos= “fade-up”></div>
This makes the element fade in and move up when it enters the screen. Overall, it’s best for portfolio, landing pages, or any site that needs scroll-based animation.
Plus, people who know CSS and want to make custom animations with full control. It is also a good option if you want fewer plugins and faster loading times.
Custom JavaScript (for Advanced Users)
If you want full control over how things move on your site, use JavaScript animation tools. They give you strong features. You can use them with WordPress. Just add shortcodes or custom code. It works really well.
Let’s explore some of the best options that work well with WordPress.
GreenSock Animation Platform (GSAP)
Let’s start with GSAP. It is one of the best tools for making animations. It is very fast and works on every browser. It is great if you want smooth and cool effects.
- You can create timelines for complex motion.
- Works with ScrollTrigger to animate while you scroll.
- Supports 3D motion, parallax, and custom easing.
- It works inside WordPress using custom scripts or plugins like Code Snippets.
Useful for: Developers making interactive designs or advanced UI effects.
Anime.js
Anime.js is great for simple and creative animation. It works with SVG, CSS, and HTML elements. You can move colors, size, shapes, and even text.
- Works with any framework (like React, Vue, or plain HTML).
- Can animate multiple things at once.
- Good for hover effects, buttons, icons, and small touches.
Useful for: Designers who want stylish, unique animations without heavy code.
Locomotive
Locomotive scroll gives your website a modern feel. It adds smooth scrolling, parallax movement, and lets you trigger animations as you scroll.
- Adds a ‘smooth scroll’ effect to your page.
- Can control animation based on scroll speed or direction.
- Often used in portfolio websites, agency pages, or storytelling design.
Useful for: Sites with scroll-based layout or storytelling content.
Smart Animation Tips for Smooth Performance
Animations are fun, right? They make your site look cool and modern. But if you use too many, your site might feel slow or even hard to use. Let’s keep it smooth and easy. Here are some tips to help you keep it clean and fast.
Only Animate What Matters
Don’t try to animate everything on your page. It’s tempting, I know! But too much motion can feel messy. Instead, focus on important parts like:
- When a new section loads.
- A button you want people to click.
- A headline or image you want to highlight.
That way, animations guide the visitor instead of distracting them.
Use Lightweight Tools
Big, heavy plugins can slow your site down, even if they add fun effects. So stick to tools that are small but powerful. My favorites are:
- Animation Addons – an easy tool made for Elementor.
- GSAP – super smooth and fast.
- Anime.js – great for fun little effects.
These tools won’t slow down your site, and they work great.
Reduce Image Size
If you use animations and big images at the same time, your site could become slow. That’s not good for visitors, especially on phones.
So, compress your images before uploading. Tools like:
- TinyPNG.
- ImageOptim.
- Pixresizer.
- Or save them in WebP format.
These can make your images way smaller without losing quality.
Always Check on Mobile
Your site might look great on a computer, but how does it feel on a phone? Sometimes, animations work fine on desktop but break or lag on mobile.
So, always check your site on:
- A phone.
- A tablet.
- Different screen sizes.
If it feels slow or glitchy, remove or simplify the animations for mobile users.
Keep the Timing Smooth
Fast, simple, clean. That’s the trick. Don’t make your animations too long or too wild. Try:
- Short delays (like 0.2s to 0.5s).
- Easy fade-ins, slides, or zooms.
- No crazy spinning or bouncing everywhere.
The goal is to help users, not make them confused!
Remember: Animations should support your content, not fight it. Keep them light, smooth, and focused on what really matters. That way, your site looks awesome and feels great to use.
Wrapping Up
You’ve learned that adding animation to your existing WordPress site is simple and flexible. Whether you use easy plugins or dive into custom code, animations can improve how visitors interact with your content. The key is to keep things smooth and focused so your site stays fast and enjoyable. Start small, try different effects, and watch your site come alive!
FAQs
Can I animate my existing WordPress site without rebuilding it?
Yes, you can! You don’t need to start over or change your theme. Just use plugins or page builders to add animations. Sometimes, a little bit of code can help too.
Do I need to know coding to add animations in WordPress?
No, you don’t need to know coding. Many tools, like Elementor and Animation Addons let you add animations by clicking and choosing options. It’s easy and works with drag-and-drop. So anyone can do it!
Will adding animations slow down my website?
Not if you do it right. Use small, well-made plugins and only animate important parts. Avoid heavy animations that use lots of resources. Also, lazy loading helps keep your site fast.
What are the easiest animations to add for a modern look?
Start with simple ones like fade-ins or slide-ins. Buttons that change when you hover over them look nice, too. Scroll-triggered animations are cool and popular. These make your site look fresh without much work.
How do I make animations mobile-friendly?
Use plugins that let you control animations by device. You can turn off or change animations for phones and tablets. This keeps your site smooth on smaller screens. Animation Addons has settings like this built in.
Leave a Reply