Cursor move effects are interactive design animations that respond to a user’s mouse movement, creating a dynamic and engaging browsing experience. In Elementor, these effects allow website elements such as images, text, icons, or backgrounds to subtly follow or react to the cursor as it moves across the screen.
With the growing demand for visually appealing and user-focused web design, cursor move effects have become especially popular on creative portfolios, landing pages, and product showcase websites. Elementor makes it easy to implement these effects without coding, especially when combined with animation-focused addons.
When used thoughtfully, cursor move effects enhance user engagement, guide attention to key content, and elevate the overall user experience without compromising performance or usability.
What Is a Cursor Move Effect?
A cursor move effect is an interactive animation where website elements respond to the movement of a user’s mouse or pointer. As the cursor moves across the screen, selected elements subtly shift, follow, or animate in relation to the cursor’s direction and position. This creates a sense of depth, motion, and responsiveness, making the interface feel more alive and engaging.
In web design, cursor move effects are often used to highlight important sections, add visual interest, or create immersive experiences. When implemented in Elementor, these effects can be applied without coding, allowing designers to easily enhance interactivity. It also helps to maintain smooth performance and user-friendly navigation.
Why Use Cursor Move Effects on Your Website?
Cursor move effects add an interactive layer to your website that immediately captures user attention. Instead of static layouts, elements respond to cursor movement, making the browsing experience feel more dynamic and engaging. This subtle interaction helps keep visitors interested and encourages them to explore the page longer, which can positively impact user engagement and bounce rates.
From a design perspective, cursor move effects create a sense of depth and realism, giving your website a modern, premium look. They are especially effective for highlighting key content such as call-to-action buttons, featured images, or product sections by naturally guiding the user’s focus.
Additionally, cursor move effects help strengthen brand identity by making your website feel more polished and interactive. When used thoughtfully and sparingly, they enhance user experience without overwhelming visitors, ensuring smooth navigation while delivering a visually memorable impression.
Where to Use Cursor Move Effect Animation on a Website
Cursor move effect animations work best when used strategically. Applying them to the right sections enhances user experience and visual appeal without overwhelming visitors.

Hero Sections
Hero sections are the most popular place to use cursor move effects. Subtle cursor-based movement on images, backgrounds, or decorative elements creates an immediate “wow” expression. It helps make the first impression more engaging and draws users into the website from the moment they land.
Image Showcases and Galleries
Cursor move effects work exceptionally well in image-heavy sections such as portfolios, galleries, or product highlights. Images that gently follow cursor movement feel more interactive and premium, allowing users to explore visuals in a more immersive way.
Feature Highlights and Cards
Feature boxes, service cards, or content blocks can benefit from light cursor movement. When these elements react slightly to cursor motion, they stand out without distracting the user. This is especially useful for guiding attention to important features or offerings.
Call-to-Action (CTA) Sections
Cursor move effects can subtly emphasize call-to-action buttons or surrounding visuals. When used carefully, they encourage interaction and make CTAs feel more inviting without being aggressive or intrusive.
Landing Pages and Promotional Sections
Marketing and landing pages often rely on engagement and storytelling. Cursor move effects help add depth and motion, supporting the narrative and keeping users focused as they scroll through the content.
Creative Portfolios and Agency Websites
For designers, agencies, and creative professionals, cursor move animations showcase creativity and technical skill. These effects add personality and help differentiate the website from more traditional, static designs.
Best Practice Tip
Always use cursor move effects sparingly. Overuse can harm performance and usability, especially on low-end devices. The goal is to enhance interaction, not distract from the content.
How to Add Cursor Move Effect Animation in WordPress & Elementor?
Method 1: Creating Cursor Move Effect Using Elementor
Elementor offers built-in motion and interaction settings that allow you to create a simple cursor move style effect without using any plugins or custom code. While Elementor does not have a dedicated “cursor follow” feature, you can achieve a basic illusion of cursor movement using mouse-triggered interactions and motion effects.
Start by selecting the element you want to animate, such as an image, icon, or section. Go to the Advanced tab and open Motion Effects. Enable options like Mouse Track or Scrolling Effects to allow the element to react when users move their cursor across the screen. You can control the movement direction (horizontal or vertical), animation speed, and sensitivity to keep the motion smooth and subtle.
This basic method works best for light parallax-style movements and decorative effects. It is ideal for beginners who want to add interactivity quickly while keeping the website fast, clean, and fully compatible with Elementor’s native features.
Method 2: Creating Cursor Move Effect Using Animation Addons
Cursor move effects are easy to create when you use Animation Addons. This method does not require any coding and is beginner-friendly. Below is a simple, step-by-step explanation so you can confidently apply the effect to your website.
Step 1: Activate Cursor Move Effect from WordPress Dashboard
First, you need to enable the Cursor Move Effect from the Animation Addons settings.
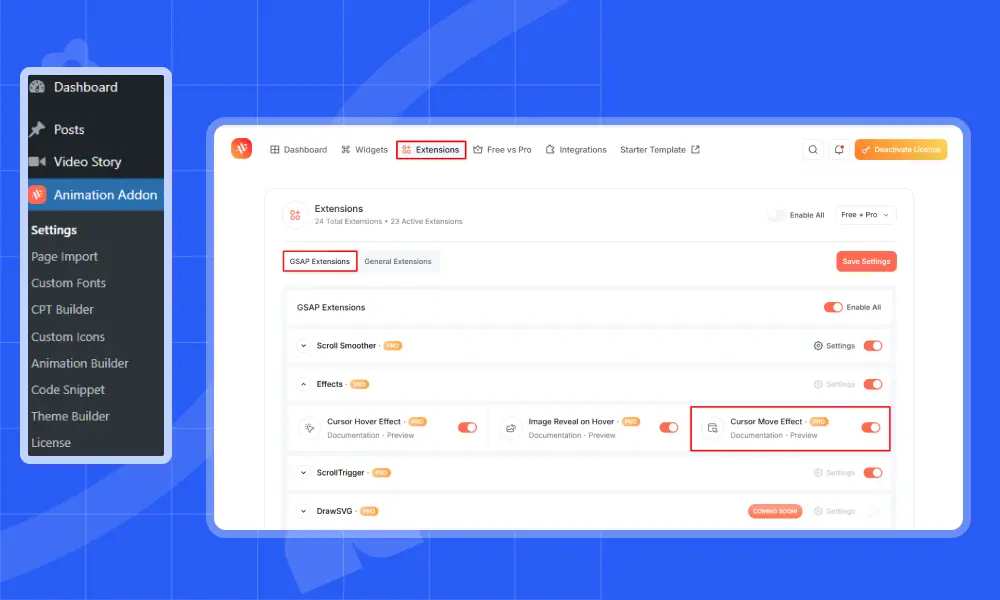
- Go to your WordPress Dashboard.
- Click on Animation Addons from the left menu.
- Open the Extension tab.
- Under the Effects section, find Cursor Move Effects.
- Now, toggle it ON to activate the cursor move effects.
Once enabled, the Cursor Move Effect option will become available inside the Elementor editor.
Step 2: Choose Your Target Element & Enable the Wrapper
Now open the page you want to edit using Elementor.
- Select the element where you want the cursor move effect (image, text, icon, or container).
- Click on the container or wrapper of that element.
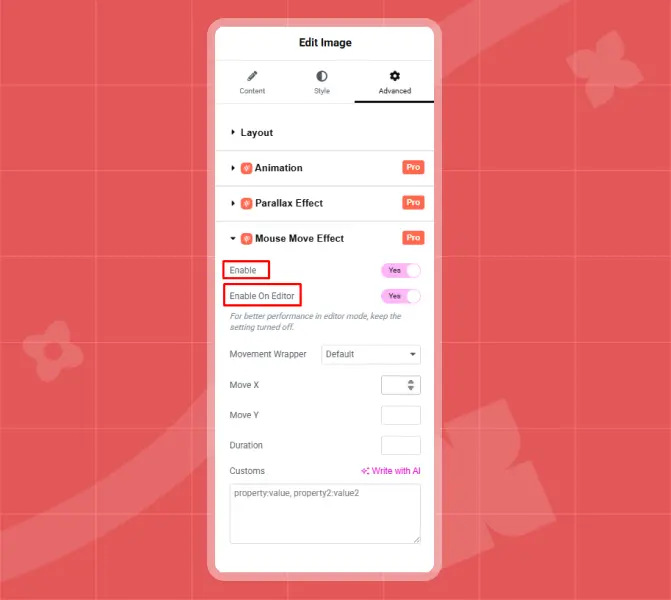
- Go to the Advanced tab.
- Find Cursor Move Effect and turn Enable to Yes.
At this point, the Cursor Move Effect is activated for the selected element.
You will see an option called “Enable on Editor”.
- If set to Yes, the animation will play inside the Elementor editor.
- If set to No, the element will stay still in the editor, but the effect will still work on the live website.
This option is very helpful for previewing your animation without leaving the editor.
Step 3: Customize the Movement Area
This step controls how and where the element moves with the cursor.
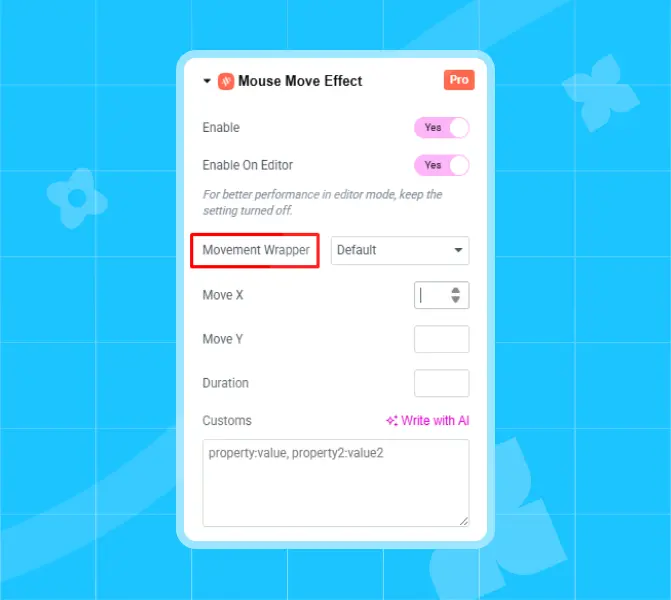
You will see two options:
- Default: Automatically applies a preset movement area. This is the easiest and most commonly used option.
- Custom: Uses a custom CSS class (default is
movement_area). You can change the class if needed.
Tip: For most users, the Default option works perfectly and is recommended.
Step 4: Adjust Move X and Move Y and Control Animation Duration
These settings control how far the element moves with the cursor.
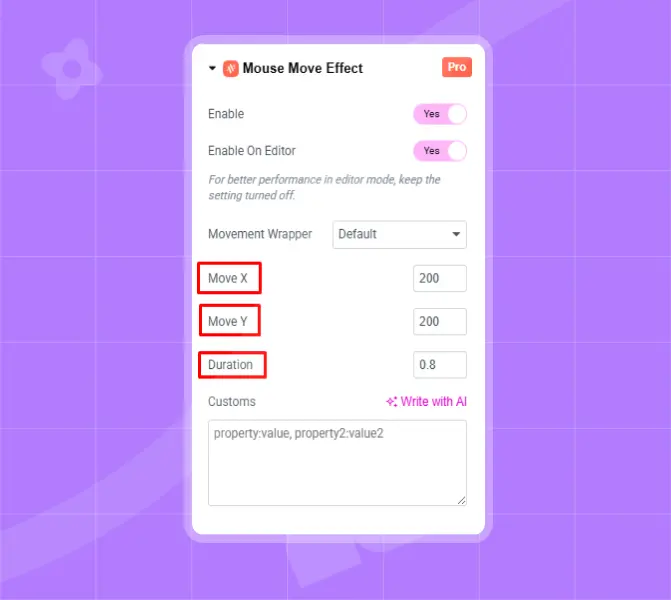
Move X (Horizontal Movement)
- Move X controls how much the element moves left and right when the cursor moves. If you use a higher value, the movement will be more noticeable. For example, setting Move X to 200 creates a smooth and visible horizontal motion without feeling too strong.
Move Y (Vertical Movement)
Move Y controls how the element moves up and down with the cursor. For example, setting Move Y to 80 gives a balanced vertical movement that feels natural and responsive. You can adjust both Move X and Move Y values until the motion matches your design style and feels comfortable for users.
The Duration setting controls how smoothly the element returns to its position after the mouse stops moving. Choose a value that feels natural and not too jumpy.
- Example value: 0.7
- Lower values = faster movement
- Higher values = smoother, slower motion
Step 5: Use Custom CSS (Optional)
The Custom field allows you to add extra CSS styles to the cursor move animation.
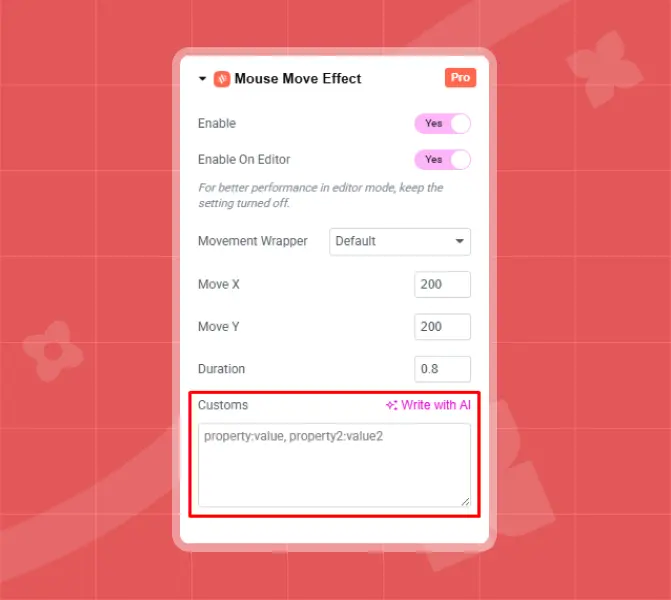
- Use simple CSS property-value pairs.
- Example format:
property: value; property2: value2;
If you are not familiar with CSS, you can safely leave this section empty, the default settings work well for most designs.
Final Output
Common Mistakes to Avoid Cursor Move Effects
A common mistake to avoid with cursor move effects is overusing them or setting very high movement values, as this can distract users, hurt performance, and make the design feel unprofessional instead of smooth and engaging.
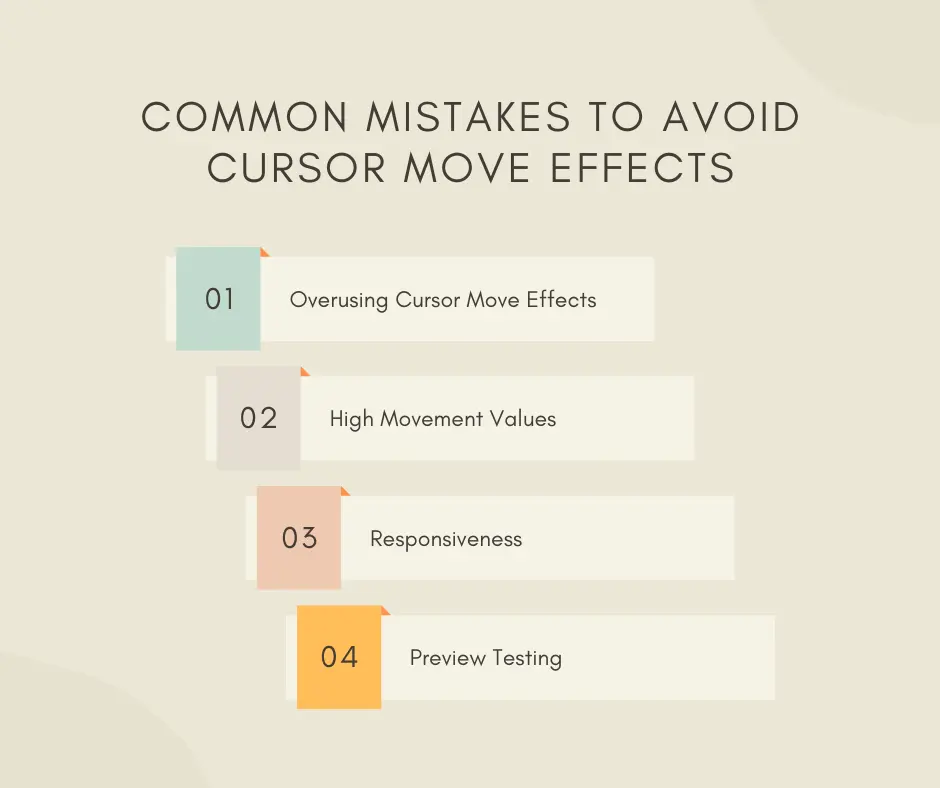
Overusing
One of the most common mistakes is overusing cursor move effects across too many elements. While the animation looks attractive, applying it everywhere can overwhelm users, distract from important content, and reduce overall usability. It’s best to use the effect only on key sections like hero areas or featured visuals.
High Movement Values
Another mistake is setting very high movement values for Move X and Move Y. Excessive movement can feel shaky and unprofessional, especially on large screens. Subtle motion always looks more polished and user-friendly.
Responsiveness
Many users also forget to check performance and responsiveness for animation like text, image or fade animation. Cursor move effects are mainly for desktop devices, so failing to adjust or disable them on mobile can lead to layout issues or unnecessary resource usage.
Preview Testing
Lastly, ignoring preview testing is a common error. Always enable the animation in the editor to see how it behaves and test it on the live site to ensure the motion feels smooth and natural for real users.
Final Words
Cursor move effects are a powerful way to add interactivity and modern visual appeal to your Elementor website. When used thoughtfully, they make your design feel more dynamic, engaging, and responsive to user behavior. With the help of Animation Addons, creating these effects becomes simple and accessible, even for beginners with no coding experience.
The key is to focus on subtle movements, apply the effect only where it adds value, and always test for performance and responsiveness. In the end, well-implemented cursor move effects help your website stand out, feel more professional, and leave a lasting impression on visitors.
FAQs
Do cursor move effects work on mobile devices?
Cursor move effects are mainly designed for desktop users because they rely on mouse movement. On mobile devices, these effects are usually disabled or have little to no impact, which helps maintain performance and usability.
Do I need coding skills to add cursor move effects in Elementor?
No, you don’t need any coding knowledge. Animation Addons for Elementor provide ready-made settings that let you enable and customize cursor move effects using simple controls.
Will cursor move effects slow down my website?
If used sparingly and with reasonable movement values, cursor move effects have minimal impact on performance. Avoid applying them to too many elements to keep your site fast.
Can I preview the cursor move effect inside Elementor?
Yes, you can enable the effect in the editor to see how it looks while designing. This helps you fine-tune the animation without switching to the live site.
Where should I use cursor move effects for best results?
Cursor move effects work best in hero sections, image showcases, featured content areas, and creative portfolios where subtle motion enhances user engagement without distraction.
Leave a Reply